Miniature Golf Course

Recently, I worked with a group of primary students (Kindergarten-2nd grade) to create a miniature golf course. Each student was in charge of creating a hole for the course. The first week, students were each given a large sheet of corrugated plastic, but cardboard would also work well for this. Students mapped out their plans, using recycled materials such as paper tubes, cups, yarn, and paper. Students balled up foil to create golf balls and used yardsticks as putters to test out their design in the beginning stages.

As students progressed, they glued on their obstacles in their permanent places. Each student had a course much different from others. One student had an inclined plane leading to the hole, another, younger student, had a scattering of corks and tubes as obstacles. This project allowed for a lot of creativity and play while also learning about angles and proportions.


In the final stages, students added in a microcontroller with a servo motor. They found ways to add blades to their motors to create a moving obstacle. The best part was when students were finished, they were all able to share their designs by playing each other’s obstacles.

Reflecting on this activity, I felt it was very similar to the wonders of pinball machines or marble runs in the making world. Fellow Cassia Fernandez did a wonderful post on pinball machines in relation to physical programming and also highlighted how the activity allows for such diversity in the design and making process. Similar to pinball machines, this idea of miniature golf courses can be done with many materials and can be made with much greater complexity depending on your audience. Students ready for advanced programming could add in multiple sensors, lights, and motors. Even my kindergarten students wanted to find ways to program the motor rebound the ball for them. While the programming experience was not there for my youngest students yet, their imagination was, which is so much of the process and experience.

Meaningful Making: Podcast Workflow.

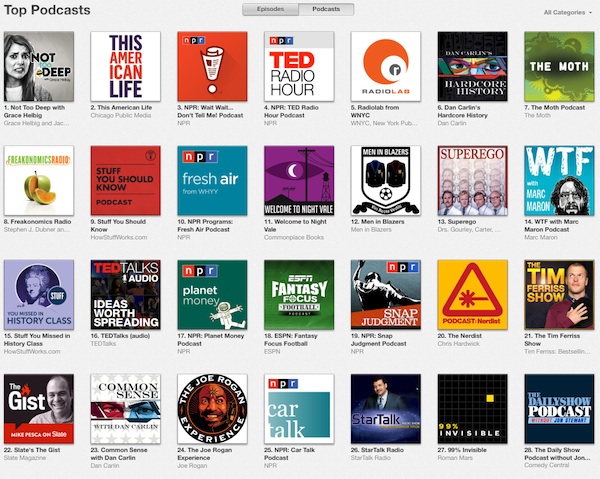
Over the past two months, the FabLearn Fellows have been quietly working behind the scenes to develop a podcast that we hope will spotlight the work of maker-educators from around the world, share constructionist best practices, and help us connect more meaningfully with each other and all of you. We’re calling it Meaningful Making because we want our listeners to use the podcast in tandem with this blog and our ebook of the same name. We’ll talk through essays posted in this blog, offer practical advice and pro-tips, and feature stories from all corners of the maker-ed movement.

Meaningful Making is not yet available on the iTunes Store, but you can stream our first episode on SoundCloud and Simplecast. We hope you enjoy it.

[PLANNING]

Talking on microphone is a skill that takes real practice. Professional podcasters have teams of producers who are paid to edit out all the vocal tics and boring parts – but that’s a luxury we don’t have at FabLearn, so we use an outline to keep everyone focused.

Tools+Materials:

How-To:

  1. Before you launch your podcast, decide what kind of podcast you want to make. Who is your intended audience? How long do you want your podcast to be? What kinds of segments do you want to include? Do some research and listen to podcasts that tackle similar subject matter. For Meaningful Making, we wanted to make content for fellow maker-educators. We wanted each episode to be 45-60 mins. and include one longer interview or roundtable discussion segment.
  2. Schedule your recording session in advance. Use an app like Doodle that will automatically adjust for time zone differences – especially if you’re dealing with far-flung hosts.
  3. Type up an outline in Google Docs and share it with your co-hosts. The key is to keep things flexible so that hosts can crack jokes, tell stories, and go on delightful tangents. The outline is there to keep everyone comfortable, not to be a literal script.
  4. Write out a podcast intro. It can be difficult to know what to say in the beginning, so having a scripted opener can cure any on-mic jitters:

Welcome to Meaningful Making – a brand new podcast brought to you by the FabLearn Fellows where we try to unpack the world of maker education, share constructionist best practices, and illuminate incredible work of the FabLearn Fellows from around the world.

[RECORDING]

You don’t need expensive gear to record your podcast, just a microphone, headphones, and some basic audio production software. If you have a smartphone and earbuds, you have everything you need. Because our podcast hosts are scattered across the globe, we use a tool called ZenCastr to organize our projects.  Zencastr records each host locally on a separate audio track, which keeps the audio sounding as good as it can.  

Tools+Materials:

How-To:

  1. Make sure you have found a quiet place to record with a reliable internet connection. This doesn’t need to be anywhere fancy — a bedroom or a closet. Just avoid public spaces with unpredictable sounds.
  2. Wear headphones (even a really cheap pair) to avoid re-recording the output audio.
  3. Log-in to ZenCastr. ZenCastr includes both free and premium tiers. The free “Hobbyist” option gives you access to 8 hrs. of recording per month with up to three hosts at a time:
  • A. Only one host needs to have a ZenCastr account. He or she will use the “Invite” button to send a private link to the other hosts.
  • B. Each host joining the session will be represented by a name tag. If ZenCastr recognizes your  system default microphone, audio levels should appear and you’ll be able to hear yourself through your headphones. If you want to change your microphone input, you can tinker with the settings (button in the top-right corner). You can also mute your microphone or “raise your hand” to cue the other hosts that you have something to say.
  • C. If you want to make a note during the recording, you can use the timeline footnote feature which will leave a time-stamped comment (e.g. “[0h42m12s] Cut out garbled audio.”)
  • D. Start and stop the recording using the big button in the top-left. Once you’re finished, each host’s audio will appear as three solo tracks for you to download separately.

[EDITING]

The editing process for a podcast can be as intensive as you want it to be. We do some light touch-ups at the end: throw in some some intro music, cut out any blatant screw-ups, and tweak the audio levels. Our process takes about 30 mins. Depending on your format and audience, you may want to do more or less.     

Tools+Materials:

How-To:

  1. Download the solo tracks from ZenCastr and import them into your audio editing software. For GarageBand, drag-and-drop the files from your Downloads folder onto the timeline and it will automatically create a multi-track project.
  2. Line up all the solo tracks so they begin at the same time.
  3. Trim out any audio content you don’t want. There will invariably be some dead audio at the beginning and end of your clip. For GarageBand, trimming audio is super easy, just move your playhead to the locations you want removed and click “Split” (Command+T). The audio should split into two pieces and you can delete the section you don’t need.
  4. Import your intro and outro music. You may want a few seconds of audio to begin and end your episode. Pick music that fits the tone of your show. I use an app called Peggo to download music from YouTube. Of course – be sensitive to copyright issues when you’re downloading other people’s intellectual property. Search for “podsafe music” (Free Music Archive rules!) or compose your own. You may want to adjust the music levels to smoothly fade in and out the music.
  5. Normalize the tracks so that there aren’t discrepancies in volume. There are different ways to do this, but I use a free app called the Levelator, a combination normalizer-compressor-limiter with an absurdly simple user interface.
  6. Export your podcast. In GarageBand, click Share from the menu bar and select Send Song to iTunes…

[SHARING]

Your audience will dictate where you share your work online. Maybe you want to post your content through a Facebook page? Or embed it on your WordPress blog? Or broadcast live on Mixlr? If you want to hit a general swath of listeners, it’s a smart move to get it on the iTunes music store, where most podcast subscriptions happen. If you want to learn more about the state of the podcasting industry, check out Nick Quah’s excellent newsletter Hot Pod.   

Tools+Materials:

How-To:

  1. In order to get your podcast on the iTunes store, you need your content hosted online and have access to its RSS feed. There are a bunch of ways to do that, but we found that SoundCloud and Simplecast are two of the most intuitive options.
  2. To upload to SoundCloud, it’s as easy as dragging and dropping your file onto the webpage. You’ll want to add some episode cover art and follow the necessary specifications for the iTunes store: Artwork must be in the JPEG or PNG file formats and in the RGB color space with a minimum size of 1400 x 1400 pixels and a maximum size of 3000 x 3000 pixels at 72 DPI.
  3. To upload to iTunes, copy your podcast’s RSS feed from SoundCloud, which is available on your Content Settings page.  Log-in to iTunes Connect using your Apple ID. Click the + in the top-left and paste your RSS feed. Click “validate” and your podcast information should auto-fill in the Feed Preview:
  4. You have to wait a few days for Apple to check your podcast for content requirements. Once you’ve been approved, you don’t have to resubmit. New episodes will auto-upload through your RSS feed.

[LISTENING]

In order to be a good podcaster, I believe that you have to make content that you’d like to listen to. If you’ve never heard a podcast before, discover some new ones. Most radio shows publish their content in pod form and some podcasts offer live recordings where you can connect to listener communities. 

Tools+Materials:

How-To:

  1. If you’re brand new to podcasts, explore the Top 200 podcasts (US) and stream a few before subscribing. If you’re looking for podcasts that aren’t on that list, try searching YouTube. Many fans and content creators upload select episodes to YouTube to reach a broader audience
  2. Apple has published a simple primer on how to subscribe to podcasts on iTunes/iPhone/iPad. If you have an Android device, you can subscribe to podcasts on Google Play Music or through a third-party podcatcher app. My preferred app for listening to podcasts is Overcast (iOS) because it unobtrusively trims out pauses in between speech (I’ve trimmed out 28 hrs. of audio!)


Introducing basic computer science to K-12 students in Dakar

As mentioned in my last post, I am actually working on “Hands-on and heads-in ” learning program with K-12 students in the scope of the Cheikh Anta Diop FabLab Académie, “The mobile FabLab”.
Started 4 weeks ago, let me show you some results of what we have been doing so far.

School 1 : ”TIERNO SILEYMAANI BAAL”: 40 students


2- School ”Les DAUPHINS”: 33 students

In summary, we let them discover computer components and we teach them how  to use a keyboard and a mouse with games. We used open sources software called GCompris to practice while playing at the same time!
Special thanks to my team mate for their great inputs in the success of this project.
Our next training will be focused on Scratch, building Electronics and 3D printing.

You are all invited to follow us on facebook, twitter 


Papert’s 8 BIG IDEAS (Italian translation)

Le 8 grandi idee del Costruzionismo di Papert

estratto dalla tesi di dottorato: “An Investigation of Contructionism at the Maine Youth Center” di Gary Stager , 2007


Imparare facendo

Quando imparare fa parte di un’esperienza attiva ed interessante, impariamo meglio. Impariamo ancora meglio quando possiamo usare quello che abbiamo appreso per creare qualcosa che ci appassiona.

Tecnologia come materiale da costruzione

Costruire attraverso la tecnologia, soprattutto quella digitale, permette di imparare cose nuove e   moltiplica le possibilità creative ed espressive.

Divertimento Tosto (hard fun)

Impariamo e lavoriamo meglio quando quello che stiamo facendo ci piace….questo con vuole dire che debba per forza essere facile! Il divertimento migliore è quello “tosto” che ci mette in       difficoltà, ci sfida e ci fa impegnare ancora di più.

Imparare ad imparare

Non si impara solo facendosi istruire. Nessuno può insegnarci tutto quello che c’è da sapere nella vita, ognuno di noi è il timoniere della propria esperienza di apprendimento!

Prendersi il giusto tempo

Imparare a gestire il proprio tempo quando si sta facendo qualcosa è difficile quanto importante. Non ci si può aspettare che qualcuno lo gestisca per noi, come spesso siamo abituati a fare a scuola.

Sbagliando si impara

Le cose importanti non funzionano mai al primo colpo…solo sbagliando e riflettendo su cosa è accaduto si può andare avanti e migliorare.
Per avere successo devi concederti la libertà di inciampare ogni tanto!!

Fai da esempio

Impariamo da ogni esperienza ed ogni esperienza è unica ed irripetibile!!
Ogni difficoltà è un opportunità per imparare cose nuove….la miglior lezione che possiamo dare ai nostri studenti è far vedere loro che anche a noi imparare e migliorare costa fatica.

Il nostro è un mondo digitale

Imparare a conoscere le tecnologie è più che mai importante per i bambini di oggi…al pari di leggere e scrivere.
Imparare tutto sui computers è importante per il loro futuro; MA nel presente è ancora più importante che i bambini sappiano sfruttare i computer come strumenti per imparare tutto il resto.

Making the Buttons

img_3691img_4170

One of the surprise hits of our makerspace this year has been the humble button maker. When we were setting up all the new equipment and tools in our renovated CTE classroom, we ran across an old button maker sitting neglected in a storage closet. Luckily, we also found a box of button parts. The button maker was heavy and hard to use but worked most of the time. A month later, students in the makerspace had gone through 750 buttons.

We realized that the button maker is one of the most scalable tools in the makerspace. An entire class of students can make a personalized design during a single class period. Buttons are a timeless real world product that students are happy to pin on their backpacks. Buttons also have great profit margins as they cost $0.10-0.25 but can be sold for $1-2.

img_3722img_3708

When we ran out of buttons, we couldn’t find the odd size that our old button maker took. After some careful research, we ended up buying $1,000 in punches and button makers from American Button Machines. (This company was recommended by a number of librarians.) This may seem crazy but has been well worth it. Students have made more than a 1,000 buttons this quarter. The smaller buttons can also be made into a variety of keychains and zipper pulls. The graphic design for buttons can also serve as a stepping stone to designing for other digital fabrication devices such as the laser cutter, vinyl cutter, CNC or 3D printer.

How can buttons be used in the classroom?
Campaign Buttons: Historical & student elections
Political Movements: Civil Rights, Peace Movement, Occupy Wall Street
Wearable art
Self identity and self expression
Fundraising: school clubs, fields trips, charities
Social awareness: anti-bullyin messages
Entrepreneurship and marketing
-sports marketing: team logos & mascots
-marketing: brand recognition, icons
Role-play
Collaborative job roles: Buttons for each team role such as leader, recorder and time keeper
Simulations: rock/water cycle, atoms making molecules
Memorials
QR code and Snapchat avatars
Emoji: empathy/mood
Mastery Badges

img_4325

A great resource for button research is http://buttonmuseum.org/.

How do you use your button maker in your classroom or makerspace? Leave a comment or contact me on Twitter @DesignMakeTeach, Facebook or  Instagram.

img_4412

3D Printing Rosa Parks

screen-shot-2017-02-01-at-1-28-37-pm

I’ve written before about the lack of models related to African American History and Culture in my posts 3D Printing Martin Luther King, Jr. and Looking for African American History on Thingiverse. The lack of models is a great opportunity for students to contribute designs. Things are improving slightly this year with Thingiverse featuring both an MLK and an African American History collection on the front page. I’m happy to have contributed some models and a little inspiration but there should more depth to these collections.

I was looking for a quick idea for a model and was thinking about a Run-DMC logo or silhouette of the group. (I’ve been watching Netflix’s excellent Hip-Hop Evolution series.) I found a list of 100 Greatest African-Americans and started searching names on Thingiverse and received mostly NO RESULTS FOUND messages. (more…)

Papert’s 8 big ideas traslated to Catalan

8 grans idees darrere del Laboratori Construccionista d’Aprenentatge

Extracte de la tesi doctoral “An Investigation of Contructionism at the Maine Youth Center? de Gary Stager 2007.

La primera gran idea és aprendre fent. Tots aprenem millor quan l’aprenentatge és una part del fer alguna cosa que ens sembla realment interessant. Aprenem de la millor manera quan fem servir el que aprenem per fer alguna cosa que realment desitgem.

La segona gran idea és la tecnologia com a material de construcció. Si  pots utilitzar la tecnologia per crear coses, pots fer coses molt més interessants. I  pots aprendre molt més creant-les. Això és especialment cert en el cas de la tecnologia digital: els ordinadors de tot tipus incloent el Lego controlat per ordinador del nostre laboratori.

La tercera gran idea és la diversió difícil. Aprenem millor i treballem millor si gaudim del que estem fent. No obstant això, divertir-se i gaudir no implica que el que estem fent sigui fàcil: la millor diversió és la diversió difícil. Els nostres herois esportius treballen molt dur per esdevenir millors en el seu esport. El fuster més reeixit gaudeix fent fusteria. L’empresari reeixit gaudeix treballant dur fent negocis.

La quarta gran idea és aprendre a aprendre. Molts estudiants adquireixen la idea que l’única manera d’aprendre és sent ensenyat per algú altre. Això és el que els fa fracassar a l’escola i en la vida. Ningú pot ensenyar a ningú tot el que necessita saber. Un ha de fer-se càrrec del seu propi aprenentatge.

La cinquena gran idea és prendre temps, el temps necessari per al treball. Molts estudiants a l’escola s’acostumen al fet que els diguin cada cinc minuts, o cada hora, “fes això, fes allò” o “ara fes el següent”. Si algú no els està dient què s’ha de fer, llavors s’avorreixen. La vida no és així. Per fer qualsevol cosa important un ha d’aprendre a fer anar el seu propi temps. Aquesta és la lliçó més difícil per a molts dels nostres estudiants.

La sisena gran idea és la més gran de totes: no es poden fer les coses ben fetes si abans no s’han fet malament. Res important funciona a la primera. L’única manera de fer les coses bé és analitzar acuradament el que va succeir quan van sortir malament. Per tenir èxit es necessita la llibertat d’equivocar-se pel camí.

La setena gran idea és fer nosaltres mateixos el que demanem als nostres estudiants. Estem aprenent contínuament. Tenim molta experiència d’altres projectes similars, però cadascun és diferent. No tenim una idea preconcebuda de com sortiran les coses exactament. Gaudim el que estem fent, però ens esperem que sigui dur. Sabem que hem de prendre’ns el temps necessari per fer-ho bé. Cada dificultat amb la qual ens trobem és una oportunitat per aprendre. La millor lliçó que podem donar als nostres alumnes és deixar que ens observin en la nostra lluita per aprendre.

L’octava gran idea és que estem entrant en un món digital on conèixer sobre la tecnologia digital és tan important com saber llegir i escriure. Així que aprendre sobre els ordinadors és essencial per als nostres futurs estudiants, PERÒ el propòsit més important és fer-los servir ARA per aprendre, sobretot, la resta.


Physical Computing Team: The Origins

After Sylvia’s private talk with each of us couple of two weeks ago, we (Cassia, Alphonse, Per-Ivar, and Angela) had funnily enough formed a working team, and our first meetup related to Physical Computing took place on Sunday (28th of January 2017).  

In our first online meeting we felt very excited to be working together. Although we live in very distinct areas of the globe (Italy, Rwanda, Netherlands and Brazil), we share many similar interests and feel that we can learn a lot from each other.

We all work with kids and adults, but in very different contexts in terms of: cultural, social and political stage of  “tech-related” evolution. Although, even with this differences, we feel the common need to create a social environment, both physical and digital (for students, for teacher, for everybody) where we can promote more conscious, active and creative relationships with technology.

To do so, we feel that learning in a constructionist way about coding the physical and digital world can help our students to become familiar with basic electronics concepts in an meaningful and creative way.

Since we are concerned about helping our communities in this way, we think that one of our tasks is to share resources and inspirations.

Everyone of us is already working on it with many interesting projects so it was natural for us to start sharing resources and reflections about how to introduce and scaffold learning about coding, electronics and hardware in a constructionist way. Suddenly it becomes clear that we can join the forces to reach our common goal.

While imagining how to do this, we took some inspirations from Papert’s words about technologies that supports learning:

For a technology to be effective, it should provide easy ways for novices to get started (low floor) but also ways for them to work on increasingly sophisticated projects over time (high ceiling).

Together, we aim to develop a collection of resources that can be welcoming for the beginners, allow the development of more sophisticated projects (Arduino code, Python, microcontrollers) and inspire creativity through tinkering.

Around this resources everyone of us is interested in creating a local community of users (students, teachers, makers) where to enrich and evolve the collection itself. In this way, this resources could be created and refined locally with groups of teachers and students and shared with others to inspire the development of new ideas. We feel that having this cross nation common folder allows us to collect more resources, experiment more stuff and learn from each-other experiences.

Working in this way we’ll have the chance to see how every community is evolving and reflect about that to understand the needs and provide solutions but…most important…we can help each-other when things get hard 🙂

We feel very happy to be sharing ideas with each other, and hope our context differences might leverage and learnings and practices.

If you like you can join us to our Slack Group: FabLearn Physical Programming to talk, discuss, share or ask for help..Everybody’s welcome!!

Here is the full video of our first online meeting. The video starts with Alphonse Habyarimana, then Cassia Fernandez from 17:57, next Per-Ivar Kloen from 25:44, and finally Angela Sofia Lombardo from 41:40. 

8 grandes ideas Papert’s Eight Big Ideas translation to spanish

8 grandes ideas detrás del Laboratorio Construccionista de Aprendizaje

Extracto de la tesis doctoral “An Investigation of Contructionism at the Maine Youth Center” de Gary Stager 2007.

La primera gran idea es aprender haciendo. Todos aprendemos mejor cuando el aprendizaje es parte de hacer algo que nos parece realmente interesante. Aprendemos de la mejor manera cuando usamos lo que aprendemos para hacer algo que realmente deseamos.
La segunda gran idea es la tecnología como material de construcción. Si  puedes utilizar la tecnología para crear cosas, puedes hacer cosas mucho más interesantes. Y  puedes aprender mucho más creándolas. Esto es especialmente cierto para la tecnología digital: las computadoras de todo tipo incluyendo el Lego controlado por ordenador de nuestro laboratorio.

La tercera gran idea es diversión difícil. Aprendemos mejor y trabajamos mejor si disfrutamos lo que estamos haciendo. Sin embargo, diversión y disfrutar no significa fácil: La mejor diversión es diversión difícil. Nuestros héroes deportivos trabajan muy duro para volverse mejores en su deporte. El carpintero más exitoso disfruta haciendo carpintería. El empresario exitoso disfruta trabajar duro haciendo negocios.
La cuarta gran idea es aprender a aprender. Muchos estudiantes adquieren la idea de que “la única manera de aprender es siendo enseñado”. Esto es lo que los hace fracasar en la escuela y en la vida. Nadie puede enseñarte todo lo que necesitas saber. Tienes que hacerse cargo de su propio aprendizaje.
La quinta gran idea es tomar tiempo – el tiempo necesario para el trabajo. Muchos estudiantes en la escuela se acostumbran a que les digan cada cinco minutos o cada hora: haz esto, haz aquello. ahora haz lo siguiente. Si alguien no les está diciendo qué hacer se aburren. La vida no es así. Para hacer cualquier cosa importante usted tiene que aprender a manejar su propio tiempo. Esta es la lección más difícil para muchos de nuestros estudiantes.
La sexta gran idea es la más grande de todas: no puedes hacer las cosas bien si antes no las has hecho mal. Nada importante funciona a la primera. La única manera de hacer las cosas bien es mirar cuidadosamente lo que sucedió cuando salieron mal. Para tener éxito se necesita la libertad de equivocarse por el camino.
La séptima gran idea es hacer nosotros mismos lo que pedimos a nuestros estudiantes. Estamos aprendiendo continuamente. Tenemos mucha experiencia de otros proyectos similares, pero cada uno es diferente. No tenemos una idea preconcebida de cómo saldrán las cosas exactamente. Disfrutamos lo que estamos haciendo, pero nos esperamos que sea duro. Sabemos que tenemos que tomarnos el tiempo necesario para hacerlo bien. Cada dificultad con la que nos encontramos es una oportunidad para aprender. La mejor lección que podemos dar a nuestros alumnos es dejar que nos observen en nuestra lucha para aprender.
La octava gran idea es que estamos entrando en un mundo digital donde conocer acerca de la tecnología digital es tan importante como saber leer y escribir. Así que aprender acerca de los ordenadores es esencial para nuestros futuros estudiantes, PERO el propósito más importante es usarlos AHORA para aprender sobre todo lo demás.

Papert Poster in the works!

Cassia Fernadez and I are getting started on designing a dynamic poster with Papert’s Eight Big Ideas. Our goal is to have it downloadable in as many different languages as possible. We will start with Portuguese and English. I think we have other translations in the works, including Swahili!  One challenge is to see if we can get a groovy poster together that can be editable online……..not too sure how to make that happen but we are welcoming the challenge!  I will be using a couple of my students to be on the design team.

Google Hangout call this morning between Sao Paulo and Arcata!
Cassia and Anne