Making Remotely: Sending Embroidery Kits Home and Teaching on Zoom

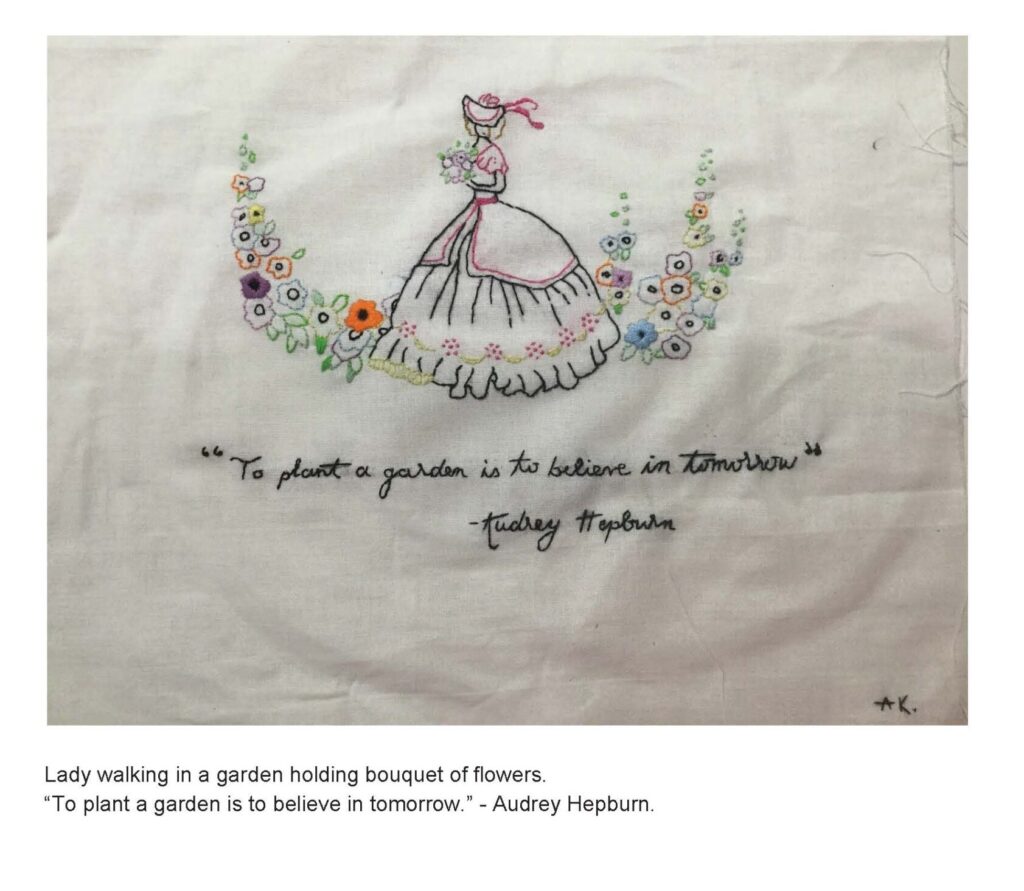
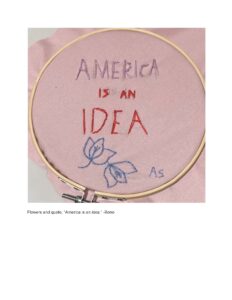
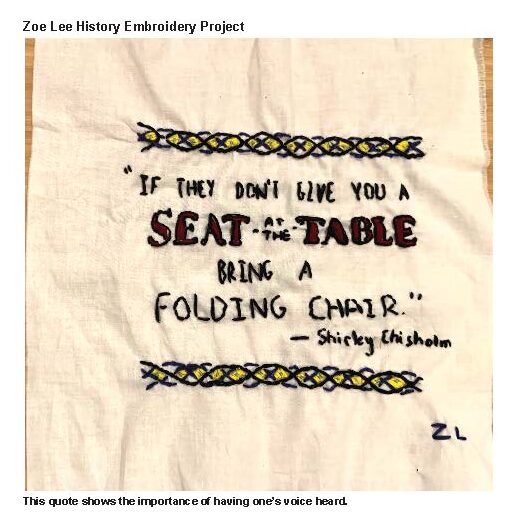
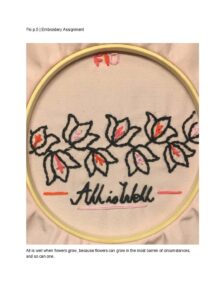
     In the fall my school was fully remote, but we had the opportunity to send supplies home before class started. I was ambitious, and I put together two different sets of making supplies as well as some printed materials for my 8th grade US history class.

The two making kits were embroidery and fabric collage. I will post later about the fabric collage.

The embroidery kits included a 6 inch embroidery hoop, a skein of black 6-thread embroidery floss, a needle (DMC size 5), and two pieces of fabric. In the late summer, when it still felt like I had all the time in the world to get ready for school, I decided to use up some of the fabric overflowing from my own collection and make drawstring bags to hold these supplies. I stayed up way too late making those bags the night before I had to drop them off at school for sorting. That was my own fault. While my timing was off, I was right that having the supplies in one bag was helpful for the project. They did 
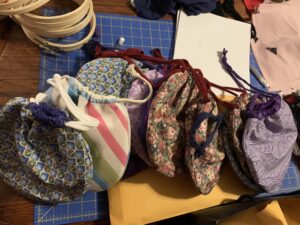
not lose the supplies over the several weeks we worked on the embroidery. I also sent home some photocopied pages of simple embroidery designs from a Dover reprint book: Early American Embroidery Designs: An 1815 Manuscript Album with over 190 Patterns by Elizabeth M. Townshend (reprinted 1985).

I found some basic embroidery videos online from my favorite sewing instructor on YouTube, the Crafty Gemini and posted those for the students. (Seriously, she is a great teacher, and her step-by-step project instructions are fantastic for sewing, quilting, knitting, bag making, and just about anything else she puts her hand to).

Over zoom, I showed the students how to get the fabric into the hoop, and how to do it so the the fabric lined up with the bottom of the hoop so you can trace from a drawing or print out onto the fabric (hold it up to a window and let the sunlight act like a light table). This is a trick I learned from another great online instructor, Shannon Downey https://www.badasscrossstitch.com/  (badass cross stitch might not be a name appropriate for school, but that is the way it goes sometimes).

The first assignment was just to get some stitches done. I asked them to submit a photo of the hoop set up with some stitches of any kind.  We worked on some other things for a while, and I could tell that some of the students were working on their own, since they asked me questions about how to do certain stitches, or what I recommended they try next. Others put the project away in the bag and forgot about it.

I talked about the importance of needlework in the lives of women as we read about Oney Judge, an enslaved woman owned by Martha Washington. When she runs away she makes a living as a needlewoman, and we talked about the history of cloth and sewing, the importance of making clothing in a pre-industrial and early industrial world, and how the skills were essential to many women being able to make their way in the world in the 18th and 19th centuries.

I had students pick quotations about the United States, history, reform, justice, or related themes in another lesson, and I brought that lesson together with embroidery to create the list of options for the embroidery assignment:

Instructions for all options:

  • Pick one of the three options listed here.
  • Your embroidery should cover (not solid, but filled, decorated, written on) more than half the size of the hoop. It may be larger if you want.
  • You may use any of the fabric (or some of your own), any of the floss, in as many or as few colors as you like.
  • Embroider your name or initials to sign your piece.
  • Turn in a good quality photograph and a one sentence explanation on schoology before winter break

Option 1: Finish the piece you started with your quotation or design

If you started with a quotation, add a small design from a part of the pattern from Early American Embroidery Designs (1815) by Elizabeth M. Townshend.

If you started with a design from a part of the pattern from Early American Embroidery Designs (1815) by Elizabeth M. Townshend, add at least 3 words or a full quotation.

You may add anything else you want to the finished piece. 

Option 2: A Modern Pattern with words and decoration

Do a google search for: free embroidery pattern printable and find one you like. Please pick one that has words and patterns or images, or add your own words to one that does not have any. Complete that pattern, or modify it to suit your taste. 

Option 3: Design your own idea and get it approved.

If you want to do something else, please pitch the idea to Dr. Pang.

We have not done any other embroidery assignments this year, but several of the students have kept going on their own. One mother contacted me to find out what supplies I should get for her daughter’s birthday, since she was embroidering all the time.

Looking back on the work, I think this project will stay in my class even when we are back to full time in person school. It unites the history of the craft, which is important in American history, women’s history, and economic history, (and really any period of history, those are just the ones that fit in my class) with practicing the craft. It is an opportunity for students to learn something that might be completely new to them, but is an ancient craft.

Weekend Maker Camp under Covid-19 conditions

Weekend Maker Camp
a.k.a. 48 Hour Tinkering-Monastery

Instead of writing a boring blog post, I asked a friend of mine to ask me some questions about my latest activities as a maker educator.

Claire: How did you come up with the idea of a 48 Hour Makercamp?

Mathias: We have a weekend and the weekend is from Friday afternoon till Monday morning. During this time the school is closed and the Makerspace is also closed but filled with possibilities.

Claire: What was the selection process for the boys who took part?

Mathias: I invited 5 boys from grades 7-10 and three decided to take part. These boys practically “live” in our schools’ Makerspace – even during normal school hours, every possibility they have they are to be found in the Lab or in the Workshop.

Claire: Did you have concrete projects that you had planned out ahead of time for these 48 hours?

Mathias: Just roughly. I wasn’t the one who did the planning, the boys had their own projects which were important for them.

Claire: What were the projects?

Mathias: The projects were roughly the ones seen in the film. Firstly, we completed the setup and initialization of our new DIY CNC router machine which we built together several months ago. Secondly, we built an add-on for our DIY cargo etrike so that our kindergardeners can ride along on outings. Thirdly, we dove deeply into 3D modeling.

Claire: Did the students need to pay for the camp?

Mathias: No. They are my students during the week anyway, the school is here and we don’t need to commercialize everything that we do. For me personally it was just two days of my spare time which I am happy to invest in such projects.

Claire: Did the students earn extra credit for the camp?

Mathias: No, it didn’t have anything to do with formal school subjects, grades or school reports. On the contrary, it would have ruined their and my intrinsic motivation, the relationship between me and them and it wouldn’t have been fair for the other students. But, actually these boys belong to the cool guys in the school despite they don’t earn excellent grades during standarized tests.

Claire: How did it work with personal distance and your relationships as students/teacher through 48 hours of living together?

Mathias: This wasn’t the first time that I’ve done something like this. I don’t see myself so much as a “teacher” rather as a “coach”. I have no problem with these settings. It’s about a mutually respectful relationship as individuals. Small barriers are of course important, for example, we sleep in separate rooms and so on but I believe it is also very possible to keep professional distance while also supporting real world learning environments. That is what Maker Education is about. As a teacher I don’t want obedience from the students, rather collaboration and making together is what it is all about.

Claire: Why did you choose to offer this during the Covid-19 Lockdown in Germany? What did you need to take into account?

Mathias: We each took a Rapid COVID-19 Antigen Test Friday afternoon which our school provides under special circumstances. I am also very grateful for the way in which our founder deals with the current lockdown situation. After the test, we built our own “contact bubble”. Coincidentally during the same weekend, the Handball World Championship in Egypt did the same thing, but ours worked.

Claire: Ha, ha…         It looked snowy in the film, is that normal for Germany?

Mathias: No at all for a long time. On Sunday morning when we woke up and looked out of the window, we were really surprised that it had snowed so much. Although the snow melted within two days, it was an exciting experience for the boys and I to scout out the empty school grounds.

Claire: Yes, it looked like a real winter wonderland! What a cool weekend adventure in January 2021 during the Covid-19 lockdown in Germany.

Mathias: Thanks for your interest, Claire!

Mole Day in the Makerspace

Happy Mole Day! Mole day is an unofficial holiday celebrated on October 23rd between 6:02 AM and 6:02 PM. The time and date are based on Avogadro’s number, 6.02×10^23, which is the number of atoms/molecules in one mole of a substance. A mole is one of the seven base units of the International System of Units (SI) that defines the amount of a substance. Mole Day and Pi Day are staples of STEM school culture that add fun and festivity into the school day. STEM educators love a good pun so of course Mole Day is filled with images, jokes and activities related to the small mammal. I was feeling like a Mole Day Scrooge because I didn’t want to join in on school activities like making a decorative stuffed mole. I realized that if I was going to make something, I wanted it to be connected to the actual science and mathematics behind the mole as a unit. I wanted to make something that helped me learn more about the mole. I wanted to celebrate Mole Day in the Makerspace! The first thing I wondered was, what does a mole of something look like? There is lots of aluminum stock available in my makerspace so that seemed like a good starting point. The atomic mass of aluminum is 26.981539 u. Which means 1 mole of aluminum has a mass of 26.981539 grams. atomic mass * molar constant (1 g/mol) * moles (mol) = mass (g) Then it was a simple matter of machining down a block of aluminum to a rough size, weighing and then filing and sanding until hitting the target mass.
And just like that we have a Mole of Aluminum! I upped the level by using a small CNC machine to engrave a mole icon and the atomic symbol of aluminum. This could be a challenge for an engineering student, fabricate a one mole object out of aluminum or mild steel. I used mass to determine the amount of material but students could also make their object by calculating the volume of one mole of the material. An activity like this is a great way to take an abstract concept and bring it to a human scale object that students can design and fabricate. Of course distance learning makes this activity impossible but CAD tools like Fusion 360 give a virtual option for exploring mole concepts in human scale dimensions. When creating bodies in Fusion 360, students can select a physical material, including a range of metals.
Once the body is made, students can look at the properties of the objects to see the mass and volume of the object. This can make for an interesting exploration as students create objects of different materials. In the image below, the bodies modeled are one mole of aluminum, gold, titanium and steel.
Please leave a comment letting me know how you celebrate Mole Day and other STEM holidays in your makerspace.

Cherokee Language Syllabary for 3D Design in Tinkercad

Cherokee Language Syllabary in Tinkercad: Go directly to https://www.tinkercad.com/things/j3LfzeEOhm8 to make a copy of this design. Each character represents a syllable in the Cherokee language. Learn more about the Cherokee language at https://language.cherokee.org/. Screen Shot 2020-10-12 at 8.08.10 PMScreen Shot 2020-10-12 at 8.07.30 PM


The purpose of this article is to present an approach to incorporating indigenous languages into the teaching of 3D printing design. This work is theoretical in that I do not teach or work with students studying the Cherokee language or culture. Rather the Cherokee font is intended to be representative of non-Roman character sets not currently incorporated into 3D design tools.

Frequently, the first 3D printing design challenge presented to students in design software such as Tinkercad is to customize an object with their name. Creating a name tag keychain familiarizes students with navigating the 3D design environment and basic tasks such as adding, moving and resizing geometric primitives. A library of capital letters enables students to easily add each letter to their project. When the design is 3D printed the student leaves with a personalized object connecting the student to the digital fabrication process.

Converting non-roman character sets into a library of 3D glyphs, allows students to easily create their name in the target language. The UN Declaration on the Rights of Indigenous Peoples recognizes the right to languages as an inherent right for indigenous peoples. Further more the United Nation recognizes language rights as the direct application of basic human rights such as freedom of expression. Creating design aids such as the Cherokee Language Syllabary in programs such as Tinkercad works to promote and normalize these rights in the 3D design world.

In creating the Cherokee Language Syllabary for Tinkercad, I referenced the Unicode Standard Version 13.0 Cherokee documentation for organization. https://unicode.org/charts/PDF/U13A0.pdf

The font file used was Plantagenet Cherokee as packaged in MacOS 10.15.7, designed by Ross Mills of Tiro Typeworks. Another font option is Noto Sans Cherokee https://www.google.com/get/noto/#sans-cher.

Converting Cherokee Font to Tinkercad Workflow
-Open Illustrator document 200mm x 200mm
-Insert Text -Change font to Plantagenet Cherokee
-Type –> Glyph
-Insert Character
-Type –> Change to Outline
-Resize character to 150mm x 150mm
-Center character on artboard
-Save file as SVG -SVG Profiles: SVG 1.1
    -CSS Properties: Presentation Attributes
    -Decimal Places: 3
    -File name = (Unicode Standard Number)
    -CHEROKEE-LETTER-(Letter Name)
-Open Tinkercad file
-Import
    -Center on: Art
    -Dimensions: Length: 11.44mm
    -Change height of character to 4 mm

Any errors in the creation of this resources is mine alone. Please feel free to leave a comment if you have any suggestions for correcting errors or making improvements.

Papert’s Eight Big Ideas translated to Arabic

In 1999, Seymour Papert, the father of educational technology, embarked on his last ambitious institutional research project when he created the constructionist, technology-rich, project-based, multi-aged Constructionist Learning Laboratory inside of Maine’s troubled prison for teens, The Maine Youth Center. As Gary Stager shares in the book, Invent To Learn: Making, Tinkering, and Engineering in the Classroom, Papert outlined these 8 Big Ideas to help visitors understand constructionism as a living, practical approach to creating an optimal learning environment.

These principles have been translated into many languages (see Around the world with the 8 big ideas of the constructionism learning lab) and appear here in Arabic, courtesy of Ilaria La manna of Studio 5/6, a Fab Lab based in Qatar focusing on hands on learning for youth.

Arabic

الفكرة الكبرى الأولى هي التعلم عبر الممارسة. نتعلم جميعًا بشكل أفضل عندما يكون التعلم جزءًا من القيام بشيء نراه مثيرًا للاهتمام، ونتعلم أفضل ما في الأمر عندما نستخدم ما نتعلمه للقيام بشيء نريده حقًا.


الفكرة الكبرى الثانية هي استخدام التكنولوجيا كمواد بناء. إذا كان بإمكانك استخدام التكنولوجيا لصنع الأشياء، يمكنك صنع أشياء أكثر إثارة للاهتمام، كما يمكنك تعلم الكثير من خلال صناعتها. هذا ينطبق بشكل خاص على التكنولوجيا الرقمية: أجهزة الكمبيوتر من جميع الأنواع بما في ذلك الليغو (LEGO) التي يتم التحكم فيها بواسطة الكمبيوتر في مختبرنا.


الفكرة الثالثة الكبرى هي المتعة الصعبة. نتعلم بشكل أفضل ونعمل بشكل أفضل إذا استمتعنا بما نقوم به. لكن المرح والاستمتاع لا يعني “السهولة”. أفضل أنواع المتعة هي المتعة الصعبة. الأبطال الرياضيين يعملون بجد لتحسين مهاراتهم الرياضية، وأنجح نجار يستمتع بعمل النجارة، كما يستمتع رجل الأعمال الناجح بالعمل الجاد في إبرام الصفقات.


الفكرة الرابعة الكبرى هي تعلم التعلم. يحصل العديد من الطلاب على فكرة أن “الطريقة الوحيدة للتعلم هي عن طريق التدريس”. هذا ما يجعلهم يفشلون في المدرسة وفي الحياة. لا أحد يستطيع أن يعلمك كل ما تحتاج إلى معرفته. عليك أن تتولى مسؤولية التعلم الخاص بك.


الفكرة الخامسة الكبرى هي أخذ الوقت؛ الوقت المناسب للوظيفة. اعتاد العديد من الطلاب في المدرسة على إخبارهم كل خمس دقائق أو كل ساعة: افعل ذلك ، ثم افعل ذلك ، الآن تفعل الشيء التالي. إذا لم يخبره أحدهم بما يجب عليه فعله، فإنه يشعر بالملل. الحياة ليست هكذا. لفعل أي شيء مهم عليك أن تتعلم إدارة الوقت بنفسك. هذا هو أصعب درس للكثير من طلابنا.


الفكرة السادسة الكبرى هي الأكبر على الإطلاق: لا يمكنك أن أن تحصل على الصحيح دون أن تخطئ. لا شيء مهم يعمل من المرة الأولى. الطريقة الوحيدة لتصحيح الأمر هي النظر بعناية إلى ما حدث عندما حدث خطأ. لتحقيق النجاح، تحتاج إلى الحرية في التمعن فيما حدث والتعلم.  الفكرة السابعة الكبرى هي أن نفعل لأنفسنا ما نفعله لطلابنا. نحن نتعلم طوال الوقت. لدينا الكثير من الخبرة في مشاريع أخرى مماثلة ولكن كل منها مختلف. ليس لدينا فكرة مسبقة عن كيفية عمل ذلك بالضبط. نحن نستمتع بما نقوم به، ولكننا نتوقع أن يكون ذلك صعبًا. نتوقع أن نأخذ الوقت الذي نحتاجه للحصول على هذا الحق. كل صعوبة نواجهها هي فرصة للتعلم. أفضل درس يمكن أن نقدمه لطلابنا هو السماح لهم برؤيتنا نعاني من أجل التعلم.


الفكرة الكبيرة الثامنة هي أننا ندخل عالمًا رقميًا حيث أن المعرفة بالتكنولوجيا الرقمية لا تقل أهمية عن القراءة والكتابة. لذا، يعد التعرف على أجهزة الكمبيوتر أمرًا ضروريًا لمستقبل طلابنا، ولكن الغرض الأكثر أهمية هو استخدامها الآن للتعرف على كل شيء آخر.

The story of the Constructivist Learning Laboratory is documented in Gary Stager’s doctoral dissertation, “An Investigation of Constructionism in the Maine Youth Center.” The University of Melbourne. 2006.

FabLearn Conversation with Nalin Tutiyaphuengprasert – Making in the time of COVID-19

In this video conversation, Nalin Tutiyaphuengprasert speaks with Sylvia Martinez about how the DSIL Fab Lab in Bangkok Thailand is working with local hospitals and medical professionals to design, prototype, and build aerosol boxes for COVID-19 patients. These acrylic boxes are placed over a patient during procedures requiring close contact, reducing the chance of disease transmission. In this conversation, I talk with Nalin about how this project got started and what they have been learning along the way.

Resources (provided by Nalin)

Facebook site for DSIL (much is in Thai, but Facebook translation is not too bad)

DSIL Innovation and CSR for Covid-19 Warriors Project – Nalin’s account of the timeline and process of designing the boxes. Includes design files.

More about Nalin
Nalin Tutiyaphuengprasert is co-founder and senior vice provost of Darunsikkhalai School for Innovative Learning (DSIL) in Bangkok, Thailand and a Senior FabLearn Fellow. She works as a learning designer, trainer and director of a social enterprise project to scale up Constructionism and Digital Fabrication for Learning in Thailand.

More about FabLearn
FabLearn is a network, research collaborative, and vision of learning for the 21st century. FabLearn disseminates ideas, best practices and resources to support an international community of educators, researchers, and policy makers committed to integrating the principles of constructionist learning, popularly known as “making” into formal and informal K-12 education.

FabLearn is based on the work of Columbia University Associate Professor Paulo Blikstein and the Transformative Learning Technologies Lab (TLTL).  FabLearn develops research sites and disseminates resources and information through three main initiatives: FabLearn Labs (formerly FabLab@School), FabLearn Conferences and FabLearn Fellows.


Building a New Makerspace – Resources

I was recently asked to give a presentation and makerspace tour for a learning environment conference hosted at my school. The audience was architects, furnishing sellers, edtech distributors and Virginia educators currently in the process of planning new building construction and major renovations. I assembled a short list of resources that I thought would be valuable in the process.

Screenshot 2019-11-10 22.43.18

Please leave a comment saying what resources you would add or remove from this list.


Reference Guide 6 page summary ($) – Consider this the SparkNotes guide to makerspace planning suitable for principals, school board, PTA, board of supervisors. Covers lots of ground in 6 pages for folks that aren’t going to read a whole book.
-Making and Makerspaces in Education https://www.nprinc.com/making-and-makerspaces-in-education/


Essential Reading List
-Invent to Learn: Making, Tinkering, and Engineering in the Classroom 2nd Ed. https://www.amazon.com/Invent-Learn-Tinkering-Engineering-Classroom/dp/0997554371/

-Meaningful Making: Projects and Inspirations for FabLabs and Makerspaces, vol 1& 2 https://fablearn.org/fellows/meaningful-making-book/

-The Space: A Guide For Educators https://www.amazon.com/Space-Educators-Rebecca-Louise-Hare/dp/1945167017/

-Make Space: How to Set the Stage for Creative Collaboration: https://www.amazon.com/Make-Space-Stage-Creative-Collaboration/dp/1118143728

-Safer Makerspaces, Fab Labs, and STEM Labs: A Collaborative Guide https://www.flinnsci.com/safer-makerspaces-fab-labs-and-stem-labs-a-collaborative-guide/ap9964/


Makerspace Playbook
https://makered.org/wp-content/uploads/2014/09/Makerspace-Playbook-Feb-2013.pdf

Starting a FabLab
https://fabfoundation.org/getting-started/#fab-lab-questions

CTE Makeover Challenge Bootcamp
http://www.ctemakeoverchallenge.com/cte-makeover-bootcamp/

MIT Edgerton Center: Makerspace Resources for K12 Educators
http://k12maker.mit.edu/

_______________________________________________________

Virginia DOE Safety Resources
-VDOE Safety in Science Teaching (2018)
http://www.doe.virginia.gov/instruction/science/index.shtml

-The Safety Best Practice Guide for CTE
http://www.doe.virginia.gov/instruction/career_technical/technology/index.shtml

FabLearn webinar: What is AI – Educator Edition with Stefania Druga

UPDATE: The webinar archives are available:

Webinar Resources (provided by Stefania)

Cognimates.me – Live platform for AI experiments in Scratch
http://cognimates.me/projects/ – Example projects
Research links:
Druga, S., Vu, S.T., Likhith, E., Qiu, T (2019).Inclusive AI literacy for kids around the world In Proceedings of ACM Fablearn conference (Fablearn’19).ACM, New York, NY, USA.
Druga, S., Williams, R., Breazeal, C., and Resnick, M. (2017). Hey Google is it Ok if I eat you?: Initial Explorations in Child-Agent Interaction. In Proceedings of the 2017 Conference on Interaction Design and Children (IDC ’17). ACM, New York, NY, USA, 595-600.
Druga, S., Williams, R., Breazeal, C. (2018). How smart are the smart toys ?: Children’s and parents’ attributions of intelligence to computational objects.” In Proceedings of the 17th ACM Conference on Interaction Design and Children (IDC ’18). ACM, New York, NY, USA, 231-240.
Williams, R., Vazquez, C., Druga, S., Maes, P., Breazeal, C., (2018) My Doll Says It’s OK: Voice-Enabled Toy Influences Children’s Moral Decisions. In Proceedings of the 17th ACM Conference on Interaction Design and Children (IDC ’18). ACM, New York, NY, USA, 625-631.
Touretzky, D., Gardner-McCune, C.,Martin, F., Seehorn, D., (2019) Envisioning AI for K-12 – What should every child know about AI?, AI for K-12 Working Group Report
Charisi, V., Habibovic, A., Andersson, J., Li, J. and Evers, V. (2017). Children’s Views on Identification and Intention Communication of Self-driving Vehicles. In Proceedings of the 2017 Conference on Interaction Design and Children (IDC ’17). ACM, New York, NY, USA, 399-404.
Designing for Children’s Rights Guide (2018), https://childrensdesignguide.org/

Webinar Topic: Artificial Intelligence (AI) and education

Our expert guest is Stefania Druga, whose research on AI education can inform educators in all subjects and grade levels.AI is a “hot topic” in education, but not well understood. In this webinar, Stefania will help us separate the hype from the true educational value of AI now and in the future, and point to resources that educators can use today. Stefania will also share her research and insight on how children view AI, smart toys, and other intelligent agents that are increasingly common in their lives.

This webinar has concluded. It was held on Friday, May 24th 9AM -10AM PDT.

More about Stefania
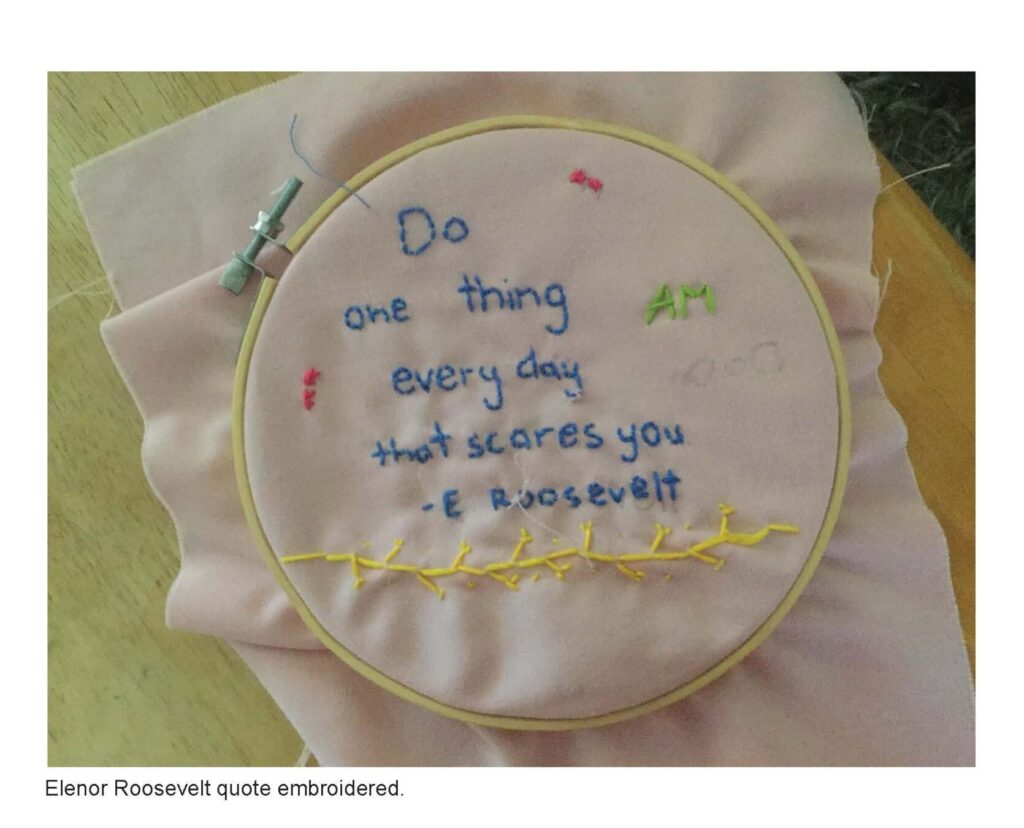
Stefania Druga is the creator of Cognimates, platform for AI education for families and a Ph.D candidate at the University of Washington. Her research on AI education started during her master in Personal Robots Group at MIT Media Lab. Currently, she is also a Weizenbaum research fellow in the Critical AI Lab and an assistant professor at NYU ITP and RISD, teaching graduate students how to hack smart toys for AI education. She co-founded Hackidemia, a global community for maker education present in 40 countries, Afrimakers, initiative for learning by solving global challenges in 10 African countries and MakerCamp , global camps for learning how to build and run maker spaces. During her research in the past two years, she has observed in longitudinal studies how 450 children from 7 countries are growing up with AI and how they can acquire AI literacy concepts through creative learning activities with the open source AI coding platform she has created.

More about FabLearn
FabLearn is a network, research collaborative, and vision of learning for the 21st century. FabLearn disseminates ideas, best practices and resources to support an international community of educators, researchers, and policy makers committed to integrating the principles of constructionist learning, popularly known as “making” into formal and informal K-12 education.

FabLearn is based on the work of Columbia University Associate Professor Paulo Blikstein and the Transformative Learning Technologies Lab (TLTL).  FabLearn develops research sites and disseminates resources and information through three main initiatives: FabLearn Labs (formerly FabLab@School), FabLearn Conferences and FabLearn Fellows.


CS, Diversity and Education

I was a middle school teacher for three years before I confronted the reality that teaching public school and financial safety in the Bay Area don’t square up. Especially with a baby on the way. I therefore quit my brief teaching career and enrolled in the most competitive coding bootcamp available. This essay is a reflection as an educator and software engineering professional on what can be adapted to any enterprise seeking to improve outcomes of underrepresented minorities in the tech industry.

It’s never too late to start, but Public Middle School is the key time and place to build long term impact

My fellow students at the bootcamp were mostly young adults, male, and asian or white. There was only a dozen or so of us who stood outside of those traits. And though efforts were made by the organization to attract minorities, it was clear the incoming demographics were not diverse enough.

Studies (1) have shown interest for STEM is either nourished or famished throughout the transition to adolescence. By the time they reach high school, women and people of color have less interest, largely due to a lack of exposure capable of competing with the myriad distractions of life as a female or minority youth. Providing those opportunities and inspiration at the public middle school level should be an educational imperative. Any enterprise seeking to improve this situation needs to acknowledge the right time and place to make the long term difference: public middle school. There’s only so much we can do at the high school level when interest has already dropped.

Be willing to train teachers and teach kids

Many vendors offer resources and materials, but more effort needs to be put into widening the curricular makeup of teacher preparation programs, which are short and lean enough already. For example, MS Math is a great place to introduce computing connections with 2D and 3D coordinate planes, a fundamental for any future front end work. K12 education can’t just be about english and math anymore. Industry should seek to collaborate with teacher prep programs and schools to increase the number of teachers (not just specialists, but all teachers) capable of CS education (2).

Industry should also partner with middle schools, high schools and (community) colleges to run meaningful learning units, workshops and hackathons with effort, investment, real life tools, and real life changing opportunities and rewards for both students and teachers.

Maintain a relationship with families and children

Low SES minority families struggle supporting their children’s educational interests. Limited budgets for enrichment and math anxiety are just two of a number of roadblocks. Because this process needs to start early, any enterprise needs to acknowledge that a reasonable metric of success will follow the middle-school-through-college trajectory of beneficiaries. This means sustaining a close relationship through programs that culminate in scholarships, internships and jobs. It also means providing life changing resources to families. Often, minority families don’t even have the means to secure internet access. (3)

To attract diversity, offer diversity. In time, narrow it down.

A heterogeneous population cannot be served by a homogeneous curriculum. Maxine Williams, Facebook’s Diversity Chief, recently said: “What we look for are people who are very good in two specific subjects: data structures and algorithms.”(4) For the middle school population, the relevance of “Data structures and Algorithms” might not be apparent. Therefore, a child’s budding engineering identity would be well served by a series of scaffolds that bridge their interest towards the hard skills.

Creative computing and collaboration are two solid starting points. At the bootcamp I learned about pair programming, SCRUM, and git (GitHub has recently announced resources for education) which could be easily taught in middle school and above. Maker and STEAM education is particularly well suited to attract a wide range of creative interests that can evolve into more specific CS knowledge. (5) IOT, tech arts and crafts, games, robotics, graphics, and sound will attract a wide audience. Variables and structured programming will follow and build on the creative and collaborative foundation. Eventually, students will be ready for data structures and algorithms, machine learning, AI, full stack concepts, frameworks and more. Or become 21st century artists, which is just as good of an outcome.

Sources

  1. Planning Early for Careers in Science (2006)
  2. Universities aren’t preparing enough computer science teachers (2017)
  3. Innovation in East Oakland: The Realities of Keeping Up Outside of Silicon Valley’s Bubble (2018)
  4. Facebook Diversity Chief: ‘We Still Have More Work To Do’ (2018)
  5. Mitchel Resnick: Designing for Wide Walls (2016)

Forces Acting on a Structure – Golf Ball Drop Challenge

Based on Idea from INCOSE Table at the Detroit Maker Faire 2015

The Challenge

Your tower must be designed to hold a paper cup as high as possible. This design must support the forces created when a golf ball is dropped into the cup.

Design is up to your innovation and creativity. Time of 15-20 minutes, (can be extended based on student age and experience). Try on your own, or with a partner, or a small group!

Tower is built of:

  • 30 pipe cleaners
  • 15 straws
  • 2 paper cups

Optional Extension:

Use slow motion video to analyse the forces seen acting on the structure during testing.

Introduction

First of all I need to give credit where credit is due: I first saw this activity at the Detroit Maker Faire in the summer of 2015. The interactive booth was run by volunteers from INCOSE. According to their website:

“The International Council on Systems Engineering (INCOSE) is a not-for-profit membership organization founded to develop and disseminate the interdisciplinary principles and practices that enable the realization of successful systems.”

This got me thinking that this would be a great activity to do with my grade 7 students in their structure unit. However, when I went to look for documentation on this activity I was unable to find it. Working from my recollection, and the only two pictures that I had of it at the Detroit Maker Faire, I managed to create the testing device and try out the activity with my classes the following year. In order to make this idea available for others, I have provided some instructions on assembly and testing below, as well as some of my observations and reflections from my experience doing this in my classes.

The folks from Detroit Maker Faire used white plastic piping for their tester. I couldn’t find any stores that had white piping and also had all the sizes of connectors I needed so I went with black ABS. The only difference as far as I can tell, is that the ABS is a bit thicker, and I believe more expensive than the thinner white material. Since I didn’t find any I can’t say for sure, but the white piping may also be a different kind of plastic (PVC?), however I don’t think that really matters for this project.

Forces Vocabulary

  • Potential Energy
  • Kinetic Energy
  • Member
  • Torsion
  • Sheer
  • Tension
  • Compression
  • Bending

*A good site for middle school students researching these forces is https://www.cadavies.com/forces-acting-on-structures.html

Testing Equipment Needed

1 ½” ABS Pipe

  • 10 foot long length
  • 2 90° elbows (female/female ends)
  • 1 tee (90°)

2” ABS Pipe

  • 2” long offcut or longer
  • 2 tees (90°)
  • 1 elbow (male/female ends)

Miscellaneous

  • Quick-Grip or Hand-Spring type clamp
  • string
  • small weight (eg. binder clip)
  • meter stick
  • video recording equipment / iPad(s)
  • tripod(s) (optional)
  • green screen or other plain background like bristle board or cardboard (optional)
  • standard golf balls
  • tape/labels & marker
  • paper bags or storage bins

Consumables Needed (bulk amounts)

  • straws
  • pipe cleaners (preferably multi-coloured)
  • small to medium sized paper cups (large enough for a golf ball, but not huge)

Student Tools Needed (class/group sets)

  • rulers
  • scissors
  • needlenose/linesmans’ pliers (optional – but better for the pipecleaners if you have them since cutting pipecleaners can damage scissor blades)

Assembly

Base:

  1. Cut 4 pieces (2 pieces 24” long, 2 pieces 12” long) off the 1 ½” pipe for the base, leaving a 6 foot section. (Cutting ABS piping smells bad, and can also be dangerous if cut using a band saw, since the tube can roll and there is large blade exposure. A miter saw is a bit safer in this case, and will give you a clean 90° angle. You can also cut it with a standard hand saw or a hack saw, just be aware of your line so that you don’t cut an angle less than or greater than 90°. It’s helpful to give a light sand to cut ends)
  2. Take the two 12” pieces and connect them using the 1 ½” diameter tee.
  3. Place the two 1 ½” diameter elbows on the ends, making sure they face the same direction, and are 90° relative to the open part of the tee joint.
  4. Connect the two 24” pieces onto the two elbows.
  5. Finally, take the remaining 6 foot offcut of the 1 ½” pipe and connect it to the tee joint in the middle of the base. Base pieces should be glued (or wrapped firmly in tape) to avoid shifting or falling on someone during testing, but the 6 foot vertical piece should be removable for easy storage.

Adjustable Drop Tube:

  1. Connect a short offcut of the 2” diameter pipe to the middle of one of the 2” diameter tees.
  2. Connect the other 2” diameter tee inline with the offcut connecting pipe, so that the internal curve within the tee points toward the open end of the pipe.
  3. Connect the elbow onto the open end, pointing in the opposite direction of the previous tee.
  4. These pieces probably don’t need to be glued, they should press-fit snugly. Glue or tape if needed. If you want to adjust the configuration, you can change the length of the offcut, or you can put in another offcut between the middle tee and the end elbow (however in this scenario you might need to have a different, female/female elbow, or you may be able to just reverse the elbow).
  5. Put the drop tube over the main vertical tube and secure it in place with a clamp. Attach a meter stick (or have one handy) to measure drop height. (I found this was better than a tape measure, since that method makes it more likely that the testing assembly gets bumped or moved)
  6. Use the string and weight to create a “plumb bob” to hang down from the drop tube exit, to help in aligning the structure accurately below.

Reflections on Design and Building

When I did this activity for the first time I could not find my original twitter post, so working only from memory, I gave students unlimited amounts of time and materials (straws and pipecleaners) and I completely forgot about the paper cups. As a result, incredible amounts of time were spent on ways of catching the ball. This was an interesting problem to solve, and there were some novel solutions, however it wasn’t what I intended. It also took far too much time to design and build. Catching the ball in the cup is a much quicker, simpler solution, that allows students to focus on the design of the entire structure overall, and the forces acting on it.

In my second iteration of this assignment, having addressed the cup issue from earlier, I discovered that students were again having difficulty creating structures that caught golf balls higher than one straw length above the table. To address this in future iterations, I plan to try two things.

First of all, I will increase the number of straws to 15 from 12. Students really seemed to be stuck with the both the idea itself, and the limited number of materials. In many cases the cup ended up being only an inch or so above the table – and in a few cases the students simply put one cup on top of the the other one inverted, and used the straws and pipecleaners to hold the cups in place. This essentially transferred all the forces to the table, and since it bypasses the straws and pipe cleaners it is not especially interesting when seen in slow motion replay. Over about 30 groups of students that did the task the last two years, only one group managed to get their golf ball final resting place to a height greater than 10 inches (or the length of one straw).

Second, I will do a better job demonstrating basic construction techniques. I may do this as a short instruction video or live in class. Previously I mostly left the kids to just figure it out, however many did not have an idea where to begin. I suppose in the ideal Papert classroom, I would just leave them to tinker with the idea and reiterate until they figured it out, but in our current time-based system sometimes a few prompts and examples are necessary in order to see success within the time constraints we have. What I plan to do is start by demonstrating with three basic wireframes: the triangular prism, the square-based pyramid, and the tetrahedron.

The triangular prism will show torsion in one plane, compared to the strength of the triangle in the perpendicular plane, as the 3 quadrilaterals on the side have limited structural strength. Next I will model how to create a square based pyramid, cutting two straws each into quarters. The top of the pyramid will be only two short bits of pipecleaner to hold them in place, and the four bottom corners will all be connected via short pieces of pipecleaner. Finally I will make a tetrahedron (triangle based pyramid) – this time tying the base together with a single pipe cleaner running through the middle of them. Using the two pyramids, students will see how torsion is first reduced (ie. square based pyramid) and then completely eliminated (ie. tetrahedon). I will finally review the difference in tension/compression construction of the two pyramids, by pushing down gently on their tops. Because the tetrahedron is tied together internally, it will only show bending (or perhaps sheer if pushed hard enough) but the square based pyramid will collapse, as the compression on the vertical members becomes tension on the base members, and the lack of internal connectivity in the base straws will clearly be seen as a potential problem for groups to avoid in their own construction.

Storage and organization can be a problem with this project if it lasts more than a few classes. You don’t want one groups work getting damaged between classes, or having their limited materials taken. I have each group label their structure with a piece of tape (no structural tape allowed though), and any extra materials they haven’t used yet go into their own labelled paper bag.

It’s helpful to begin testing and video recording those structures that are finished while the remaining groups finish their structures.

If there is time, I would also recommend trying this activity more than once with a class. Perhaps with a short time (and material?) restriction the first time and longer the second iteration. Alternatively, the class could do their first test, analyze their structure on video, and then come back to their structure and update to see if they can address structural deficiencies observed in the first test! Then they could retest the structure a second time (perhaps without the video and or only at one height that is higher than their previous structure test).

Note on sustainability: I have been thinking a lot about the materials we use. I recognize these are not very environmentally friendly, however they are at least somewhat reusable. When the project is complete, I have students dismantle their structures, and lightly used materials that aren’t too damaged are set aside for reuse.

The Testing Procedure and Video

You don’t have to record the tests, but creating a video of the testing is a great option if you have access to the technology. You can see my students’ work in this youtube playlist: https://www.youtube.com/playlist?list=PLvxZs9S0c4TdZPA6P-VUHCcR6jZ3So8VUFor a first iteration, I’m really happy with the results!

The first test is done at the minimum possible height, directly above the structure. Each group should have a piece of paper on the desk in front of their structure with their names, classes, and group numbers in thick dark ink. They also record the current height of the tester. (This is a huge help for workflow organization later!) Setup the iPad directly facing the structure tester and slightly higher than the table, preferably on a tripod and far enough away to capture the whole structure AND the groups piece of paper in front of it. If you have 2 perspectives (ie. 2 iPads) to create picture in picture it would be even more interesting, since with one camera view it’s difficult to see when things happen at the back of the tested structure. However I had only one perspective, directly from the front facing the tester, and it worked fine. Plus creating more video means more data organization and sharing logistical challenges!

Our procedure for the test went like this: A student photographer managing the iPad counts down 3-2-1. That student starts video recording in slow motion when they say “2”. Another student, or teacher, drops the ball on zero. It can be tricky to drop the ball as the test gets higher. The way you drop the ball can cause different exits from the tube, causing the ball to miss the cup. I found the the way I held it and let go created a bit of a back spin, which helped with accurate tube exits. There may be a better solution to this but I haven’t found it yet. After the ball has dropped, when the structure stops moving (after a few seconds) the student recorder stops the video. It is good to do a quick review of the video right away with students if you can, to model analysis for them. If the drop is not successful (ie. if it misses the target) delete the video and try again. However, if the balls drops successfully and the structure fails, decide whether to stop recording, or continue to a new height for another test.

I tried to ensure that the pipecleaners in structures were different colours. This is done to help with the identification and discussion during video analysis (random colours are fine, but colour coordinated could be neat too). For example “did you see the way that straw between the yellow and green pipecleaners bent in that last test?” It also helps with depth perception. (At first I used white pipecleaners with white straws, and it was a lot more difficult to do the analysis).

After a successful test, slide the drop tube up to a different height, measure and record on the paper in dark ink. As the testing continues, don’t adjust the ipad angle, just continue to keep the structure centred as it was in the first test. It might also be a good idea to take a photo to record the height before each test.

For creating the analysis video, you need some kind of video and photo app. Students take screen shots of the key moments from testing, annotate them, and then insert them into their video inline with the slow motion video. This makes it look like you are watching the test in slow motion, freezing the frame and posting text and arrows overtop, and then unfreezing the frame and completing the video. I used Skitch for the annotation and iMovie for the videos, but there are likely other alternatives.

For video expectations, I required that students have a title screen over a photo of their structure, with their class and names, and then ending credits with my name as producer, our school and the date we made the video.