Relevant Research: Evidence & Impact: Museum-Managed STEM Programs in Out-of- School Settings

Interesting paper – seems like a lot to dive into! I haven’t had time yet, but I wanted to share with you all.

Evidence & Impact: Museum-Managed STEM Programs in Out-of- School Settings (PDF)

By Bernadette Chi, Rena Dorph & Leah Reisman, Lawrence Hall of Science, UC Berkeley

“The National Research Council’s Committee on Successful Out-of-School STEM (Science, Technology, Engineering, and Mathematics) Learning has been tasked with writing a consensus report on the value of and evidence for out-of-school STEM learning programs. As part of its charge, the committee has posed the following questions to be addressed in this paper:

What evidence is there for the impact of museum- (and other designed setting) managed programs on STEM learning and interest? What is known about the impact and value of such programs on school-age children’s understanding of STEM concepts and practices as well as their interest and engagement in STEM?

What is known about the characteristics of successful programs? Does the relevant literature provide enough evidence to point to design principles for such programs?

This paper responds to these questions focusing on the evidence of the impacts and features of STEM learning programs run by museums and other designed environments, such as science and technology centers, planetariums, zoos, aquaria, etc.”

Teaching rights

Here’s an idea that can be larger in scope or can be used to manage your maker space.

I was inspired last fall while visiting the Lighthouse Creativity Lab in Oakland, where Aaron Vanderwerff teaches, by their excellent punchcard system for designating users and granting teaching rights for tools and machines in their space. Another example of student teaching in action is at Susan Klimczak’s site where teaching is built into the programming and reaches the larger community through Learn 2 Teach, Teach 2 Learn.

At Greenwich Academy we have instituted a punchcard system for our machines.  The bulk of our trained machine users are Upper School students but the list is growing with students and faculty alike.  During training sessions, students take notes, and these are serving as the step-by-steps instruction sheets for each machine.

When students teach they: solidify their own learning, share their knowledge with peers, and gain confidence.  When the teaching pool widens to include students, the heirarchy breaks down and our makerspaces become a place for students, including us.

Our punchcard here.

Make your silicone protector for soldering irons

This article has colaboration of Pietro Domingues.

There are many ways to make electronics fast and safely (using conductive inks, kits with magnetic contacts, breadboards, etc). However, the soldering method is still indispensable to definitive PCB assembles and to low cost solutions.

But handling the soldering iron may offer some risks to the user, mainly to children. To avoid these risks, it is recommended to use PPE (Personal protective equipment), as gloves and glasses. Even though, the metallic part of the soldering iron is too long and still offers risk of burning some part of the body.

Based on this, we developed a Silicone protector…

…that can be made following the 10 steps above:


1 – Cut a semi-rigid plastic film (such as obtained from folders, cards, packages in general, etc). The length must the same as from the metallic part of the soldering iron

2 – Wrap the plastic film

3 – Glue the tube with adhesive tape.

4 – Now make a lid for the tube. First, draw a circle of the same diameter of the tube on a piece of the plastic film. After this, cut the plastic film as a flower (like the image).

5 – Glue the lid on the tube.

6- This is a very important step. This tube is a mold for the Silicone, so if there exists any gap, the liquid Silicone will leak. A good solution is to wrap a thin PVC film around the tube, so it covers any possible gap.

7 – Fix the tube rigidly at vertical position. (The lid must be at the bottom)

8 – Put the Silicone in the tube. Notice that the Silicone must be suited for high temperatures (See tutorial). Fill just the half of the tube (because of the soldering iron).

9 – The Silicone still liquid, put the soldering iron inside the tube, concentric to it.

10 – Wait about six hours, and the Silicone will be solid. After checking it is solid, take the soldering iron off of the mold and cut the Silicone, exposing the tip of the soldering iron, ready to be used.

Final considerations

At the first times, the soldering iron may smell Silicone, due to the heat. It is recommended to use it at a fresh and ventilated location. Silicone is an excellent thermal insulator, but after many minutes of use the Silicone may get hot. Nevertheless, this heat is not harmful. (The unprotected soldering iron can really injury the user).

STEAM, STEM, and Making

What do these words mean? How are they interpreted by teachers, by administrators, by students, by politicians?


In the past few months I have been a part of a number of discussions surrounding this question. The conversations are genuine and in most cases have the best interests of students and learning in mind. There is one thing that I have noticed, there can be a wide range of perspectives and responses to these questions.


A question I was asked recently comes to mind, “How can we create a STEAM curriculum that will prepare students for the AP Physics exam?”


Perhaps it is time to break away from the idea that studying for and passing the AP Physics exam is what defines a rich and engaging inquiry based experience. Instead of asking, will a STEAM or Maker program allow my students to score well on an exam, we should be asking, how will the STEAM or Maker program foster a genuine love for investigation, for asking questions, for curiosity and engagement about the world we live in. How can infusing a hands on and open ended experience allow students to discover and attempt to manipulate their world, while learning and experiencing the over arching concepts that make up a science (or math etc.) curriculum?


We have the momentum now to alter the way that learning can take place in schools. So many are jumping on the Maker/maker bandwagon and the STEM/STEAM/STREAM acronyms are everywhere in the news. These new opportunities and ways to experience learning should remain true to the spirit in which they exist and not be diluted or changed because existing curriculum and pedagogy are being imposed upon them. It is important to have resources at hand for those interested in understanding more about the maker movement and how it is situated in pedagogy and learning theories.


Hands-on and inquiry based exploration is nothing new to education, but one could get the impression that it is a brand new idea in this data-driven, test-prep environment that most schools are deeply entrenched in. In the book “Invent to Learn Making, Tinkering, and Engineering in the ClassroomMartinez, Stager (2013) the first chapter is dedicated to the history of making. It illustrates how making meaning through the exploration of materials is not a new concept but one with a rich and varied past. It is important that as educators we are aware of this history and it should inform our approaches to teaching and making in our classrooms and be a part of this current dialogue on making.


One hundred years ago John Dewey wrote of the importance of creating meaningful experiences for students from which knowledge emerges. Democracy and Education  (1916),  Experience and Education (1938). His idea that learning is social and the classroom should be a social environment where ideas and knowledge is constructed and shared as a community could be the mantra of any modern day Makerspace and for any age group.


Seymour Papert’s constructionism is also rooted in the social experience. “Important concepts are consciously engaged and public entity. Constructionism is not just learning-by-doing, but engaging reflexively and socially in the task. Both the creation process and the produced artifacts ought to be socially shared.”  A Journey into Constructivism Dougiamas, M. (1998).


But even with such a rich history of maker pedagogy, there are still so many educators who are unaware or who don’t trust the methodology or the process where children can learn without being directly and explicitly told what it is they are supposed to be learning. An excellent essay on Constructivism/Constructionism is Situating Constructionism” Seymour Papert and Idit Harel (1991). This paper goes into great detail about the nature of knowledge vs the nature of knowing. I recommend this reading as just one of many possible starting points for these discussions on STEM, STEAM, and making that are happening in so many schools and districts right now.


How can we bring to the forefront the educators who do have successful programs where students are actively engaged in this way of learning? Whose students are immersed in authentic and genuine projects that are meaningful to them? I challenge all educators who believe in the power of the maker movement to bring change to the dominant pedagogical practice of teacher disseminated knowledge and data-driven standards and testing that is so prevalent in this country right now, to create spaces for this important dialogue.


Instead of situating STEAM and making into a traditional pedagogical framework of teaching and assessment, it must remain true to the spirit of making. Within the educational environment it is important that hands-on inquiry and discovery learning reference the work and research of constructivists and constructionists that have gone before.

What can these scraps reveal?

Twice a week I coach an Odyssey of the Mind team.  All week I collect scraps, recyclables and cast away objects to bring to meetings for them to peruse.  The process of searching through these materials inspires the gadgets they create, the props they invent, and costumes they fashion.  Through the practice of re-purposing and upcycling, the team engineers through both limits and possibilities.  The raw material is limited; what they would normally use to solve a problem is not always available. However, the possibilities are endless; what they can creatively envision can be pulled from the materials.

Similarly, when I was teaching in New York City, the start of the year was marked with a trip to the Materials for the Arts. The things we picked up were not only of material value, but treasured for what they offer the imagination.  A box of slide mounts become a three-dimensional construction set, wall paper samples make their way into sketchbooks and bolts of fabric become the raw material for forts.

Process can be informed by what is available and as a result unfolds in different ways.  Sometimes you have an idea and a plan and your process moves forward in a way you predetermine.  It might look like this: decide what you are going to make-> decide what material-> make it.  Starting the design process from the material can provide opportunities for a different kind of creativity and ingenuity. Instead it looks like this: discarded material-> what can you make?-> decide what you are going to make-> make it.

At Greenwich Academy’s Engineering and Design Lab we are generating all sorts of interesting scraps.  This past month fifth grade girls have been using lab scraps for their inventions for the annual Invention Convention and this week we have been busy generating more.  E+D students used the laser cutter to make Omni-Animals, an excellent project designed by FabLearn’s Brogan Miller.  My colleague, Mary Stanghoener cut out whale tails on the ShopBot with her sixth grade science class. Whether your design process has you pulling a new sheet of wood or from the scrap pile, everything is the raw material for something else.

Global Space Balloon- Engaging Kids in Something Big

It may be snowing right now but that doesn’t mean that my kids are idle by any means…. We’ve only got 6 weeks left until we launch a balloon to space!  Yup, that’s right its Global Space Balloon Challenge time!  If you haven’t heard about this great project, or just want to know more then read on.

Global Space Balloon Challenge is in its second year this year and has gained significant traction since last time this year.  I think part of the reason is that they have made it really easy to get started with an amazing set of resources on their main site.  There are also great prizes this year like, Best Photo, Best Experiment, Best Charity and on and on.

Here’s how it works:

You fill a weather balloon with helium, attach a payload, a radar reflector, a camera, a GPS tracker and then (after you get FAA clearance) you let it go.  The balloon travels to somewhere around 100,000 feet to near-space and then it pops.  A parachute deploys and your rig comes back down to the earth.  Once it is below 30,000 ft you can pick it back up on your GPS and chase it down.  Once you locate it you get to go over the data recorded during your flight and see what types of photos your camera(s) took.

Why we chose this project:

Ok, this project is just plain cool.  The kids have been so motivated while working on this project and have really leaned into their strengths to help make this project a success.  This is a big collaborative project and the students are learning to ask good questions and then figure them out.  Questions like:

  • How do you track a space balloon?
  • What rules govern the launch and recovery?
  • How much do all of the items weigh for our payload?
  • How much can a balloon lift and how do you figure that out?
  • Where will it land based on the weather and how can we predict that?
  • How do we balance our payload?
  • What is the ascent rate and descent rate?
  • And on and on.

Here’s a typical conversation from my class lately:

Me: So can you get the GoPro to take pictures and record video?

Student: I don’t know.

Me: Well, figure it out then. (student goes off to find a tutorial online)

Me: How are we going to get the balloon to land in Pawnee National Grasslands?

Student2: I’ve been testing 3 different launch sites for the last week and have the weather report, barometric pressure, wind, temperature, all in a spreadsheet as well as gps coordinates of each launch and landing site.

Me: Way to go!

Me: Hey Payload group, have you finished the spaceship model/payload container?  Why don’t you try to make a Styrofoam model on the laser cutter with stacked slices or run it on the ShopBot?  What if you just did a skeleton of the craft and then covered it with something lighter.  

Me: We need to figure out the ascent and decent rate and I need a recommendation for how much helium to buy, how big of a parachute to purchase and what our max payload weight will be.  Once you have that can you get it to the launch and recovery group too so they can run their predictions with correct data?  Thanks!

Running a large project:

I love to have a large collaborative project and a personal project going on at the same time.  I find that it eliminates down time from lack of resources and helps students to put their effort into the right places at the right time.  I spend a good 2 weeks helping students get projects researched, tasks identified and then they enter them into a master Gantt Chart.  If you haven’t used a Gantt chart in classes before for project management I highly recommend it.  Basically it is a chart with time on 1 axis and tasks on the other.  I have my student put the group project and their personal projects on the same chart so that they can see what needs to be done when. Here is a sample of the “Mega Space-Balloon and More Gantt Chart”.  You’ll see that I add a red column down to show where a grade check is and on that day, everything to the left is of the red box is due.  I have found that Gantt charts help me not only manage the project but keep students accountable in a way that keeps the onus on them.  For redirection I just say, “How are you doing with your tasks?  You know we have a grade check at the end of next period.”  -This helps me not be the driving force of the project and helps them make good choices.

There’s still time to join:

If you want to launch your own rig just jump on the space balloon challenge website and with their tutorials I think you can pull it off.  If you go for simple you should be able to complete the project in 5 hours max, plus your time to read and order the parts.

Pics in Space! (That’s our team name too)

Or, if you just want a picture of yourself in space, email us and we can hook you up.  That’s right, we are sending pictures to space!  We have rigged up a digital photo frame with a GoPro pointed at it that takes pictures every 5 seconds.  The slide show of pictures will be turned on, and the GoPro will capture the pictures (plus the awesome view behind the digital frame) as it travels up, up, up.

What a picture of yourself in (near)Space?  Just email and we can get you all set up space :at: frontieracademy.net

Here’s some extra resources that I’ve liked so far:

Good entry tutorial:

Good videos of launches

Maybe a way to log data

Equipment review site:

Spot GPS

GAS SUPPLIES—

Making and the Reggio Emilia Approach: Making the Connection

turtleThe following post was written by Jamie Bartels in responce to attending the Invent to Learn: Reggio Emilia workshop offered by Gary Stager and Sylvia Martinez at the Marymount School in New York City on February 12, 2015. He attended both as a student of early education and as newly appointed Maker Space coordinator for the Unquowa School in Connecticut. Here he ties the connection between the role of teacher in a maker space and that of the traditional pedagogista and atelierista of the Reggio Emila philosophy on education.

Making and the Reggio Emilia Approach: Making the Connection 

by Jaime Bartels 


The Process of Process

Nature and the Child

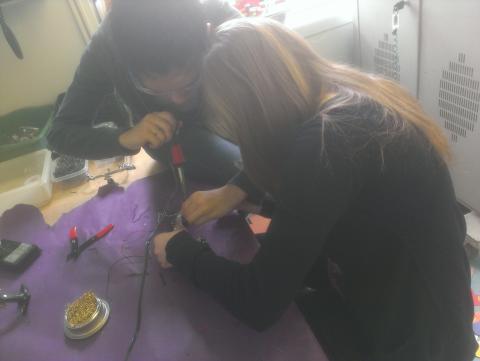
The Reggio Emilia approach to early childhood education places among the children an atelierista with two primary responsibilities: to conduct deep observation of the patterns in each child’s growth and use these observations to lead children into the process of the artist. Atelieristas often refer to this process as the “aesthetic dimension,” full of desire for meaning, curiosity and wonder. They contrast this with indifference and carelessness, conformity and absence of participation and feeling (Vecchi, 2010, p.5). The atelierista designs the atelier to be a space full of natural material and light, open to a full sensory exploration and replete with magnifying lenses, projectors, paper, paint, crayons and other tools of investigation. It is to the atelier that the child comes to engage in the process of the artist.

Nature, the Artist and the Scientist

The artist is an investigator of the natural world. The artist is often, arguably always led by an experience of the mysterious that comes from nature (including human nature) and its patterns. Vincent Van Gogh “saw nature and the artist as inseparably linked.” The Nature Conservancy has a slideshow of how nature has inspired art, including architecture, literature, music, painting and photography. The process of the artist is deep observation and contemplation of nature and natural phenomena.

Humans observe certain patterns that seem to occur in natural growth and development. From Fibonacci sequences to the Golden ratio, patterns appear everywhere in nature. We find beauty in these patterns and derive laws that seem to determine their formation: mathematics, physics, biology, chemistry. Deeper observation teaches us more about the fundamental laws that govern the processes of the world in which we live. We observe that the process of nature is the primordial source of math and science, in addition to art.

Art and science are two entwined methods of investigation leading us toward further understanding of the universe, but don’t take my word for it. Seed Magazine proclaims “the future of science is art,” guest bloggers on Scientific American write that “science and art go hand-in-hand,” lecturers at the Art Institute of Chicago argue that “history proves that the two disciplines [art and science] cannot exist without each other, enduring in constantly changing and evolving relationships.” Albert Einstein wrote famously “the most beautiful thing we can experience is the mysterious. It is the source of all true art and science.” Like the Artist, the Scientist engages in a process of deep observation and contemplation of nature and natural phenomena. Science informs art, and art informs science. As Maria Montessori wrote, “we especially need imagination in science. It is not all mathematics, nor all logic, but it is somewhat beauty and poetry.”

All this to say that placing the child in the same process as the artist and scientist is more than naïve belief in a romantic ideal. It is a way to show genuine respect to the capacity of the child and to provide them with the opportunity for such emphatic and beautiful discoveries, at their own level, as have the artist or scientist. It is pure STEAM, organically and from the ground-level (child-level) up. STEAM, that is to say, is of natural interest to the child.

… and then what? After the connection, making the leap.

The Wonder of Learning Exhibition

This exhibition, on display until May 15, 2015 in Brooklyn at 299 North 7th Street, Williamsburg, NY, is a documentative record of what happens (?) when you put the child in the same process as the artist, practice deep observation and guide with a keen eye and open ears. The learning process is the focus of the exhibition and Reggio practitioners are adamant that the focus stay on the process (Vecchi, 2010. p.114). The exhibition often gives the product of that process no more than one or two of a dozen panels, or a few, in some cases a single child-produced artifact as demonstration. Exhibition-goers looking for repeatable projects and artifacts that demonstrate the genius of the child in an exulting “a-ha” moment may feel that the exhibition does not offer them much. They miss the rather explicit message of the exhibit: do not focus on what artifact we have created with the child, though we proudly present these to you as well; focus instead on how we have engaged the child in a certain process and how we have come to understand the child’s process through our observations. Understanding of the child is perhaps the primary goal of Reggio teachers. All documentation in the Wonder of Learning exhibition demonstrates a remarkable understanding of the child’s learning process to anyone who listens to the message’s exhibit and looks accordingly.

The Image of the Child

“And so we discovered that education is not something which the teacher does, but that it is a natural process which develops spontaneously in the human being. It is not acquired by listening to words, but in virtue of experiences in which the child acts on his environment. The teacher’s task is not to talk, but to prepare and arrange a series of motives for cultural activity in a special environment made for the child.” (Montessori, 1949. p.7)

Here is the leap of faith that we must take from early childhood education into the middle childhood and adolescent years: education is an automatic and spontaneous process and the child is a capable, curious, motivated and responsible being when there exist “a series of motives for cultural activity in a special environment made for the child.” In early childhood education, in the Reggio Emilia approach the atelierista uses the atelier and the classroom “as the third teacher” to provide this; in the Montessori Method the directress uses the prepared environment and didactic materials to provide this. The goal of “making” and “maker spaces” should be to continue the provision of the motives and environment for the child’s natural process of education to continue. The image of the child must be liberal; the image of the environment must be scrupulous, stimulating, integrated into a wider culture and existing for the child — the environment must exist in a didactic role, as a teacher itself.

The Role of the Teacher

“The way in which we observe a child is extremely important. It is not sufficient to have a merely theoretical knowledge of education.” (Montessori, 1936. p.149)

“We insist on the fact that a teacher must prepare himself interiorly by systematically studying himself so that he can tear out his most deeply rooted defects, those in fact which impede his relations with children.” (ibid)

“A teacher, therefore, who would think that he could prepare himself for his mission through study alone would be mistaken. The first thing required of a teacher is that he be rightly disposed for his task.” (ibid)

Sound a little daunting to be a teacher? It should. Our task is to prepare children socially, emotionally, intellectually and morally to further the advancement of our culture: a righteous and heroic task! Countries such as the oftcited Finland (there are three different links here), and methods such as the Montessori Method (only one link) involve would-be teachers in a rigorous selection and training process. The teacher must be a perfect observer, attuned to the interests of the student and their developmental needs, ready to deliver the gift of an appropriate learning prompt to each student or student group. The teacher must also be a skilled documentarian, documenting and assisting the child to self-document the learning process. Sufficiently thorough documentation of learning in process can be one way to lead away from direct assessment and avoid a bias toward focusing on the product or artifact.

So the teacher is an observer-documentarian with a good aesthetic sense and an understanding of the developmental needs of each age range and each learner. The teacher is attuned to the environment, the student and the process of student learning, appearing just before the student needs them and retreating into the ambiance almost as soon as their presence is felt. The teacher provides sufficient scaffolding in the environment that the student does not run up against what they feel to be impossible work and suffer, nor that the student should become bored with work that is too easy. At some point you may have realized that it is impossible for the teacher to be all of this and the source of the student’s education simultaneously.

In this investigation I hope that I have shown how the idea of teacher-as-observer-documentarian is older than the current maker movement, and how the solution of some methods has been to put all the necessary tools for knowledge gathering and intellectual development in a well-ordered environment, freeing the teacher to observe and document. Thanks to the digital information environment surrounding the student of the present moment, the immediate environment is broader than ever and can cross geographical, ethnic and linguistic boundaries. If teachers in the passing era have had to act as the authoritative source of knowledge when the making of a well-ordered and didactic environment was not feasible, teachers in the arriving era have at their fingertips an interactive internet “third teacher,” compelling for its direct connection to worldwide culture and the simultaneous peer-to-peer communication it makes possible. More easily than ever before, today’s teachers can let students return to being the source of their own education and step into the more exciting, more imperative constructivist role of intensely aware observer, provoker of thought, documentarian of the learning-process and understander of how children learn.

Works Cited

1. Bartels, J. (2014). Reggio emilia: Aesthetics and the atelierista. Contact author to obtain.

2. Montessori, M. (1949). The absorbent mind. Madras, India. Theosophical publishing house.

3. Montessori, M. (1936). The secret of childhood. New York. Longmans, Green.

4. Vecchi, V. (2010). Art and creativity in reggio emilia: Exploring the role and potential of ateliers in early childhood education. New York, NY: Routledge.

Make the space speak to the kids: Experience from a visit at Bourn Idea Lab

(This blog post was written in Feb 2015. Thanks to Sylvia Martinez for editing this blog post.)

Last week, I got a chance to visit the Bourn Idea Lab, a FabLab@School at Castilleja School in Palo Alto. I spent one and a half hours observing interactions in a maker class for my study about learning environment and interaction in maker lab. I’d like to share my learning experience in this post about how impressed I was by the wonderful learning environment in the school’s maker lab. Thank you Angi Chau and Heather Pang for supporting my visit.

Learning Dynamic in Maker’s Lab. In the class, there were about 14 girls ages 11-14 years old. There were 4 different learning goals in that session. Students moved around the class working on their tasks. The teachers moved around too, facilitating students in different corners. Some students were designing on their laptops,  others were downloading software or struggling with computer network. Some students were learning how to 3D print with a teacher coaching them closely. Some students were learning how to use soldering kits with the other teacher. This seems like normal working environment in any maker lab. Teachers came to me and said that “Feel free to ask any question. This is quite chaotic here but please make yourself comfortable.”

I was impressed with the high level of student motivation as they worked on their projects.There were many students in the class walking around freely, talking to each other, and making noise as they accomplished goals. I saw many instances of sharing with each other as well as self-learning in this class. As I looked around, I asked myself,  “What makes this happen?” and “How do the teachers make the learning so personal, yet so productive in this environment?”

Decentralized Educative Experience Through Physical Learning Materials. The teacher teams at Castilleja have done a great job in combining a variety of learning resources and designing a space that supports self-learning very well. All the materials were labeled, easy to find, easy to clean up, and not it was not difficult to learn how to use them. The space was designed to separate different kind of tasks, so that students know where to go. All learning materials had good detailed instructions that make it easy for students to read and self-check by themselves. Even all the small electronics pieces are color-coded, which is very helpful for the beginner to get started on their own just from reading instructions.

Teacher instruction is still essential in some tasks that may need high-level skills.

Although the room had a high energy level, the conversations were not loud and chaotic at all. This is because most of the learning took place in “silent conversations” between students and all the well-planned materials and instructions. I witnessed these effective “silent conversations” with a girl, as I sat next to her and observed her laser focus in her work continuously for 45 minutes. She was working quietly by herself with a booklet telling her how to make a radio project.
3P’s of Educative Learning Space. The Bourn Idea Lab is a wonderful example of how the teachers orchestrate the learning environment to support dynamic and personalized learning. I’d like to summarize with 3 Ps that I learned.

1. People
– Design how teachers work in class; assign clear tasks to teams supporting students
– Design a culture that encourages peer learning. Students are encouraged to help and learn from each other.

2. Platform
– Design a space that “tells stories” or “gives instructions”.
– Use labels to help novice makers feel comfortable trying new things by themselves.

3. Process
–  Design units of learning that allow students to correct mistakes and move on to the next steps by themselves.
– Teachers coach students one-on-one or in small groups in high skill level tasks. Teachers also walk around to help solve emerging problems.
– After the end of the class, teachers reflect about the class and discuss the emerging issues to come up with solutions together.

We know that projects encourage students to deeply connect to their own learning in a personal and highly motivating way. However, it can be frustrating for novices to try to make projects without any support and even more frustrating to have too much support and no personal choice. What I witnessed at Castilleja School was the way that real-time teacher facilitation, combined with the carefully designed space and high quality instructional materials creates the balance needed to solve this challenge. I will take the “3 Ps” I learned here into consideration as I continue to explore learning environments in maker labs.

Overview – Lighthouse Creativity Lab

Recently I was tasked (or really I tasked myself) with creating a writeup of our program at our (Lighthouse Creativity Lab) website.  When I heard  there were questions about embedding making and a maker mindset into standards based curriculum, I thought I would share my writeup here.  In addtion to this overview, we have narratives of ongoing projects at our site. As a public charter school, we are working to integrate making into a CCSS and NGSS aligned curriculum and we are working with other schools in the area to do the same.

The Lighthouse Creativity Lab is integrating making into the Lighthouse Community Charter School program. We approach this work with a growth-mindset, so it is constantly evolving. We have seen that design, making, and inquiry build student ownership of learning, and lead to higher engagement, deeper understanding, stronger character development.

Classroom Integration

Integrating making into the classroom is the core focus of our program. We have built the transcontinental railroad when studying westward expansion, used circuit blocks to investigate electricity, and written programs to learn about Cartesian coordinates. We integrate making when it supports student understanding at a deeper level. This year we are integrating programming and elements of design throughout our K–12 program.

The program director serves as a curricular coach, collaborating with teachers to integrate design, making, and an inquiry stance into practice.

Electives

We currently offer a middle school enrichment and high school elective:

7/8 Making Enrichment—As part of an enrichment wheel, all 7th and 8th grade students take this class for one-third of the year. The focus is to help students develop autonomy and creativity. Students engage in projects ranging from creating cardboard hands capable of grasping objects, to programming in Scratch, to creating mini-makerspaces for our kindergarten classrooms.

High School Electives—Lighthouse offers two making electives—robotics and making. In the fall, students in both classes are presented with open-ended challenges in order to learn specific objectives. This is followed by open-ended projects where students take the lead and use their skills to develop their own ideas.

The making class starts with skill-builders: a chair, a pillow, a soldering kit, and an introduction to Arduino. In December, students decide on a project they will spend five months creating in order to showcase at the Maker Faire.

In robotics. students start the year with a set of parts and work together to build and program robots to solve challenges. For example, students program robots to follow a black line as a way of learning to use if-then statements. In the second half of the year, students use what they learn to compete in the Botball competition.

 After-School Program

The Lighthouse Creativity Lab runs two after-school programs:

K–8 Creativity Lab—Students engage in projects that both extend work happening during the school day, as well as expose them to whole new areas of interest.  Our K-4 students engage in weekly classes that give them a chance to design and build projects in a variety of media. Middle school students are given the autonomy to explore areas they are excited to learn about.

High School Creativity Lab—After school, our high school space becomes a drop in makerspace. Students use the space to work on projects their teachers have assigned, to create teacher commissioned projects, and to explore their own passions.

A History of the Lighthouse Creativity Lab

  • Making as a part of Physics since 2009
  • High school robotics class since 2009
  • Making integrated into robotics enrichment since 2010 – Students showcasing projects at Maker Faire Bay Area since 2011
  • K–12 Creativity Lab program starts in 2013-2014
    • 2013-14 – HS Elective + After School + Curriculum integration (coaching) + Professional Development
    • 2014-15 – Added 7/8 elective + HS After School Drop in
  • Future – In the 2016–17 school year, Lighthouse II will open, featuring a maker-centered curriculum

Documenting a project using a “failures box”

img_1172At Laboral Centro de Arte y Creación Industrial, I worked with 6 groups this year from primary school to high school, each one with a different project. Consequently a lot of prototypes are hanging around the fabLAB. In order to keep the lab not too messy I decided to have each group fabricate stackable boxes by modifying a design from thingiverse. Modifying and fabricating the box is the first group activity I run with each group, so it also serves as an introduction to laser and vinyl cutting.

After each session the kids put the stuff they make into the box/boxes (depending on the dimensions).  The project/prototype “has the permission” to stay out of the box only when the kids consider it shareable. So when we get to that stage, I ask the kids to empty the box and reconstruct the evolution of the project by using the previous prototypes/failures as ‘chapters’. They can make photos, videos, write text, dramatize, dance etc. in order to explain what they did and how they feel about each step.

Generally they have a great time doing it, and they understand the importance of documenting in order to tell someone how to do something. Also they became aware of what they have learned. They laugh a lot about the previous failures and dead-end solutions. They seem to be more comfortable about previous feelings of frustration. It makes them more motivated to own their own projects and take risks.

Documenting something you made in order to share it is one of the most constructive practices of the maker culture.  Thanks to documentation, a lot of people all around the world can learn, experiment, remix, and re-design building on the base of other people’s work. I like to think of knowledge sharing as the action of feeding a global shared brain that makes all of us smarter and wiser.

During an inspiring conversation about hands-on learning activities, FabLearn Fellow Susan Klimczak told me: “In experiential learning, you know exactly what you have learned when you document it.” Documentation is the missing ingredient in traditional thinking about assessment and self-learning. Many teachers involved in “maker” programs and schools are familiar with the idea of documentation as base for assessment and formative (pedagogical) evaluation, but I think we can take advantage of the benefits of documentation in more ways.

I believe we need to integrate documenting practices as part of making activities as well as designing, tinkering, digital fabrication and programming in order to enable students to document their own learning process and experiment with the beauty of building shared knowledge. Documentation is a hard task even for adult, but it is not so hard if you design a reason and a consistent expectation that everyone will collect and organize the things they will share. This expectation of students contributing to the failure box is that it will help them tell the story, chapter by chapter, of their project.

The “failure box” documenting tool is still a work in progress. The sharing part of it is still not as natural and as integrated into the process as I would like. I hope to continue to experiment with documentation and ways to improve the learning process.