Drawing: a visual language for Makers

arduino2
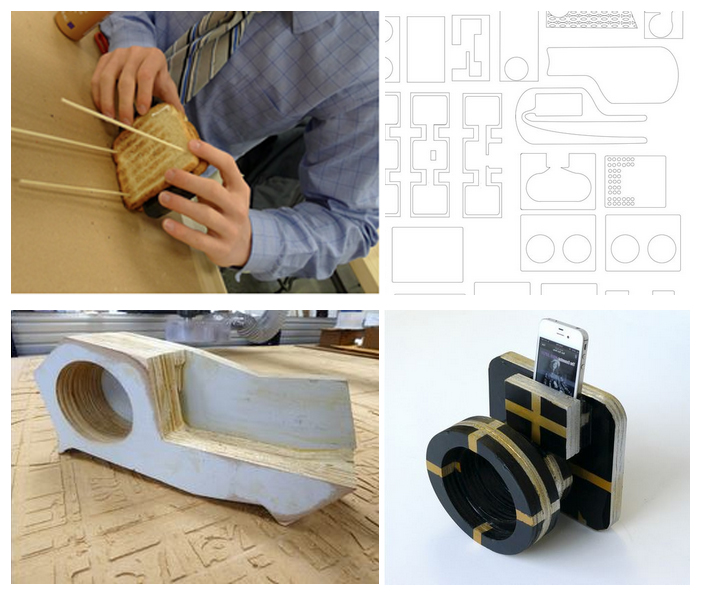
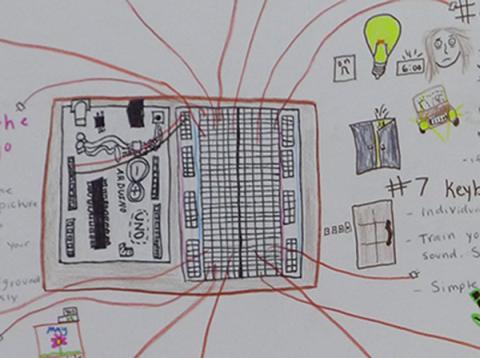
Drawing is like writing, using pictures instead of words.  It is a form of communication that can be useful, expressive, descriptive and observational.  It provides form to visual ideas.  Including drawing as part of the process of making things is fun and provides a good framework for understanding 2D and 3D design.

Enclosed is a list of drawing approaches that are used most in the Engineering and Design lab.

Orthographic projection

Useful for understanding multiple 2D views of a 3D object.  Used in architecture and engineering. Critical information could include measurements. This type of drawing is an excellent exercise leading up to 3D modeling.  It provides a framework for students to understand how to work around a three dimensional object.

ortho

Isometric projection

Artificial 3D representation using x,y,z axis and 120 degree angles.  Great for communicating 3D ideas quickly and an excellent precursor to linear perspective.  MC Escher used it in optical illusions. Check out how it can depict impossible objects.

rachel

Building plans

Building plans can include all of the above.  Think lego instructions or ikea furniture.

Mind map

This is a great way to express ideas in graphical form.

arduino

Arduino Mind Map

Descriptive drawing

This kind of drawing is very useful as a record of your observations.  Think Lewis and Clark journey log or Albertus Seba’s Cabinet of Natural Curiosities. Annotate with notes for even more detail.  Great sketchbook or journal entry.

Schematics

Drawings of systems using symbols.  Think subway map or circuit diagram.

The stuff to make drawings

A lot of the drawing that happens in the lab is preperatory work for 2D and 3D design for fabrication.  Precision matters here so students have access to good measuring and drafting tools.

  • Calipers
  • Tape measures
  • Different types of rulers (clear, cork bottom, various sizes)
  • T-squares
  • 45/90 and 30/60 Triangles
  • Compasses
  • Drawing paper
  • Different types of graph paper (cartesian, dot, isometric)
  • Graphite and colored pencils
  • Sharpies
  • Grey graphic pens
  • Brush markers
  • Industrial pencil sharpener

More thoughts on drawing….

A maker with a literacy with drawing can feel confident about representing their ideas visually.  Whether they are communicating an idea for self-expression or for a technical end, these drawing methods can work together and provide a powerful tool for bringing the ideas of one’s imagination into the world.  There are many more types of drawing than what I have listed here and ultimately we develop hybrid styles that best reflect what we are trying to communicate.

The power of Making what you can Imagine

screen-shot-2014-12-27-at-5-58-07-pm
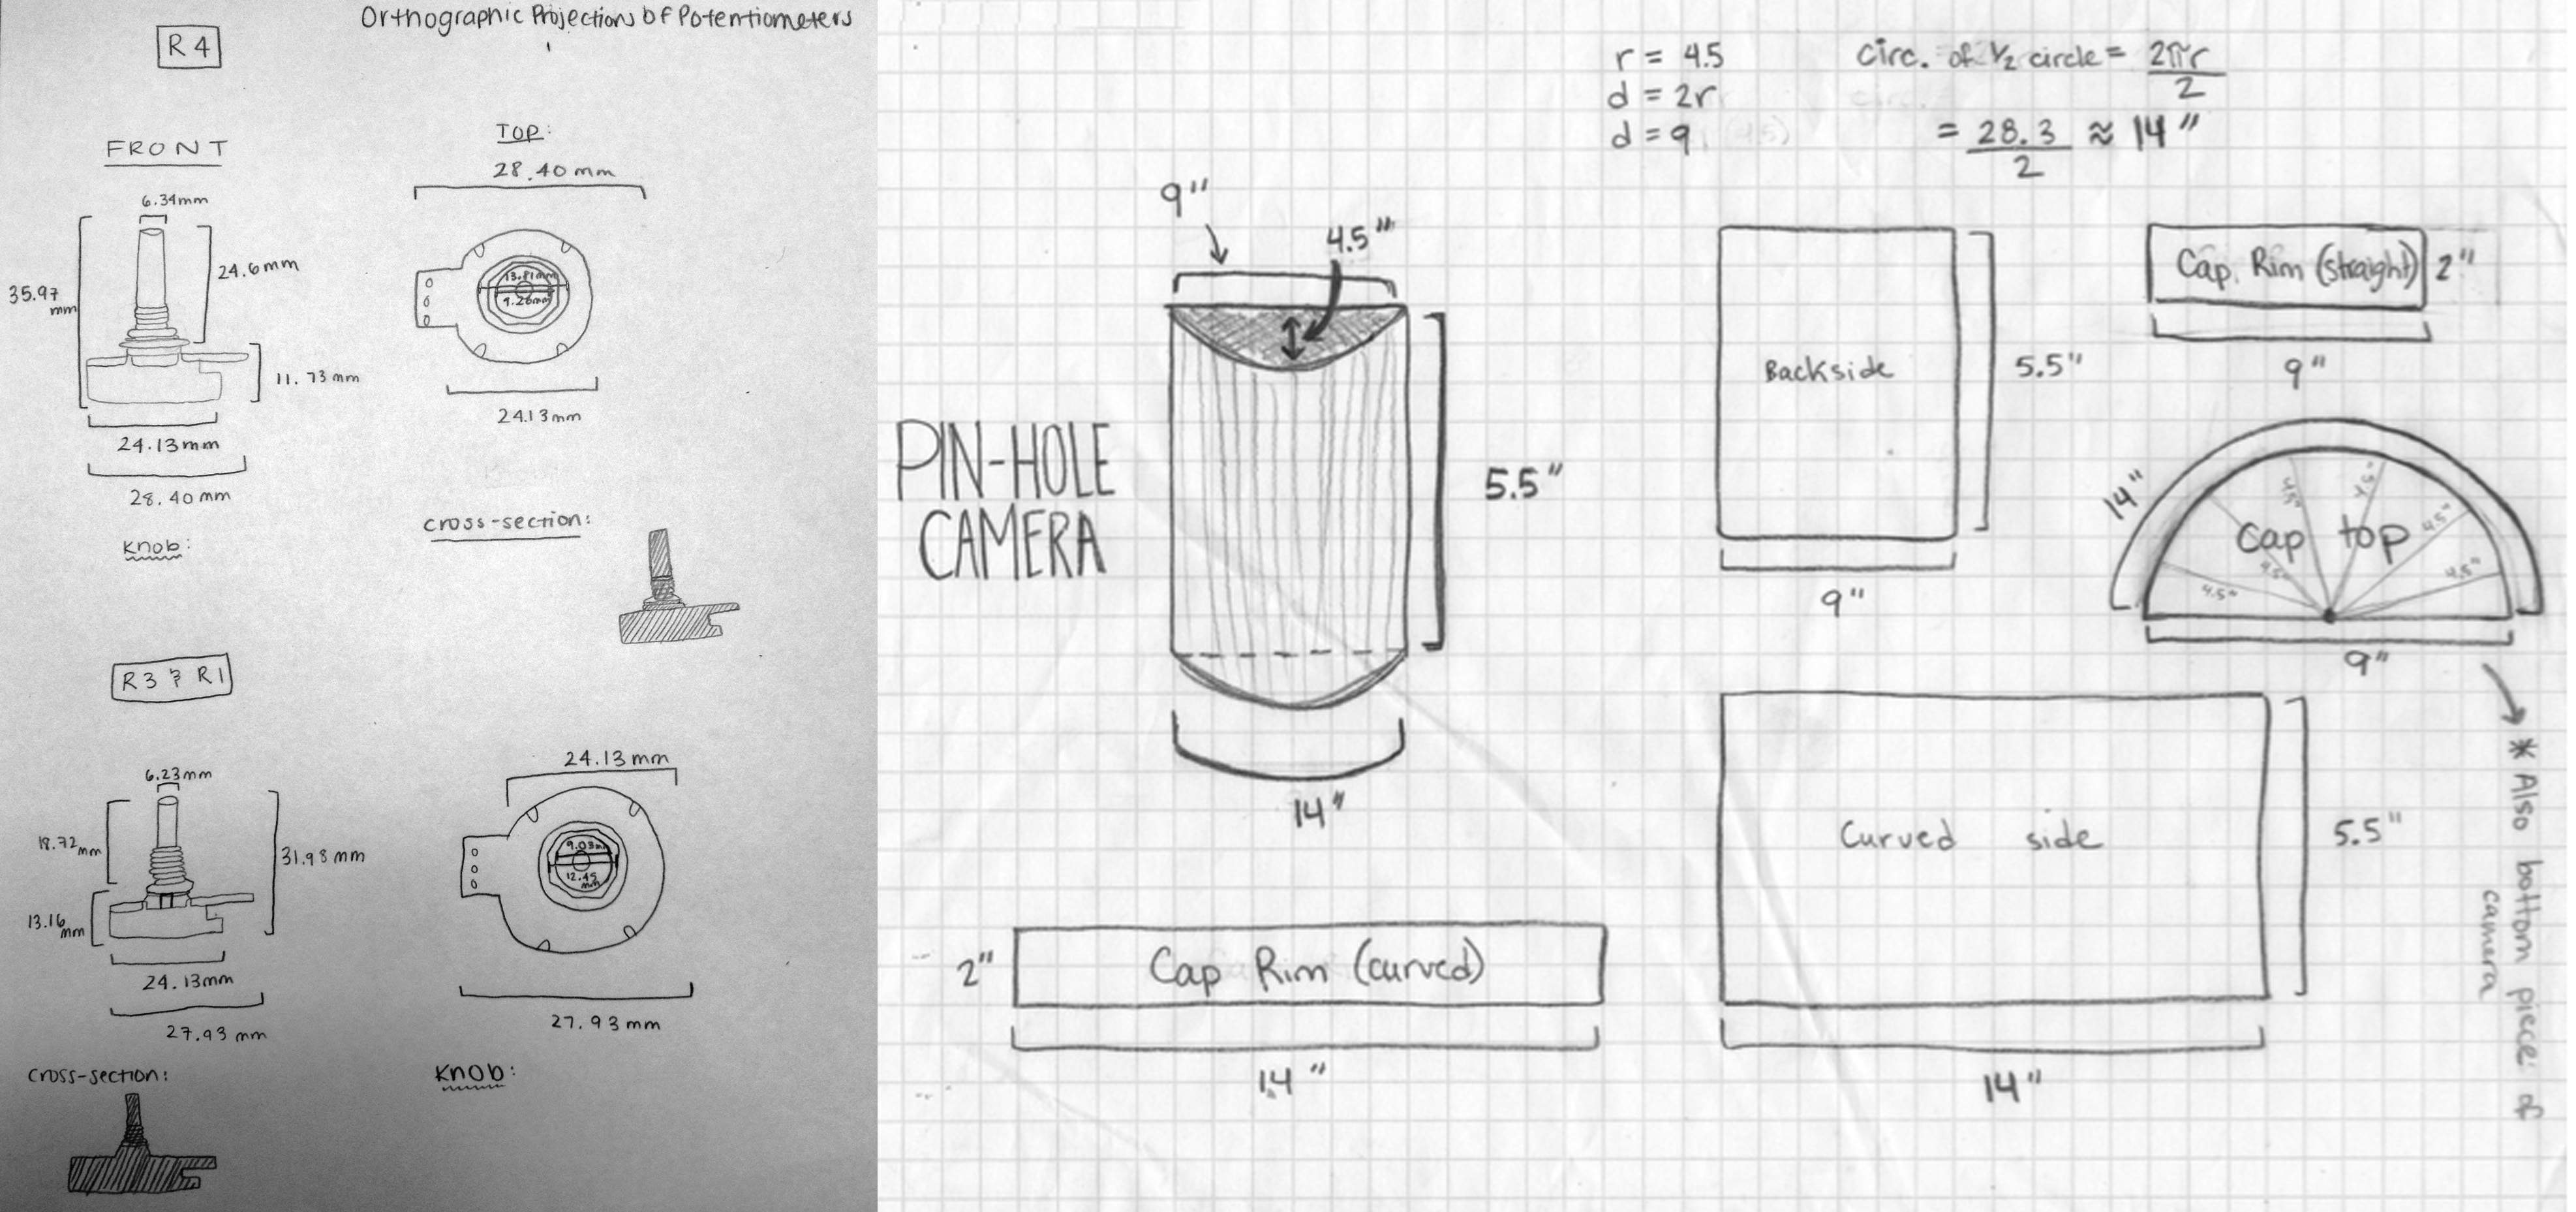
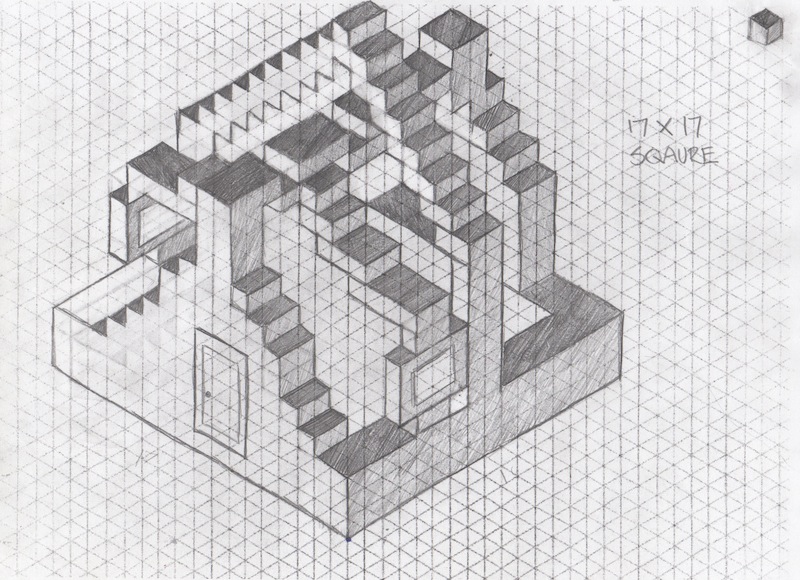
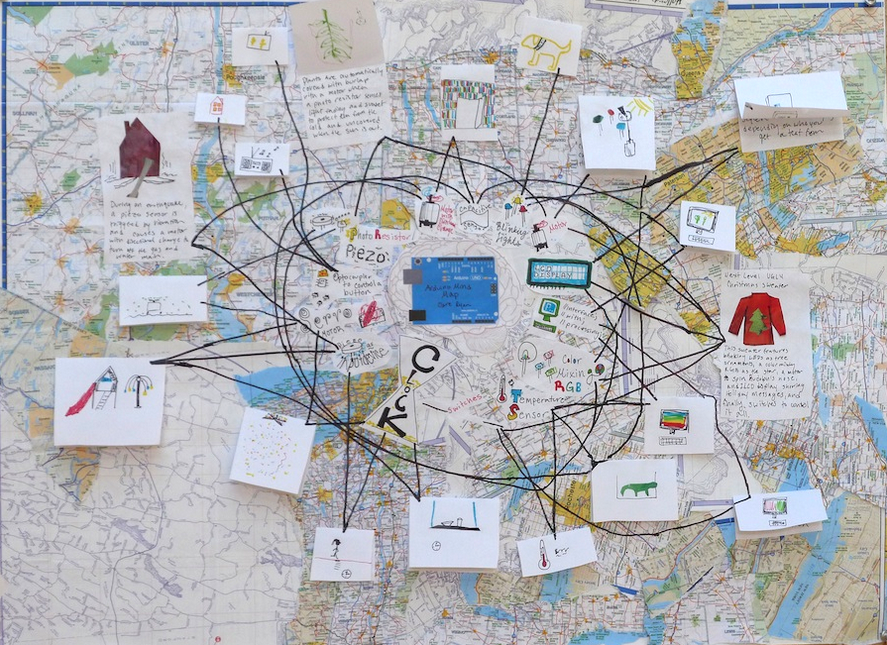
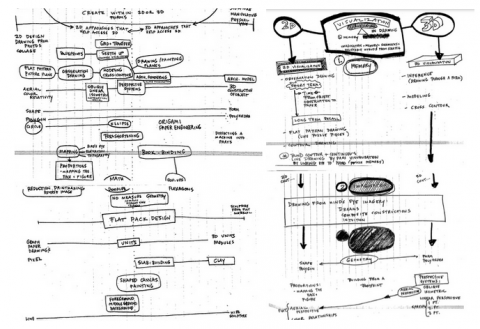
Several years ago while while teaching an upper level drawing class I noticed that some of my students were struggling to understand 3D space on the 2D drawing plane.  In an effort to help these and future students, I reimagined a way of keeping track of studio projects based on where they might be organized by their 2D-3D “ness” on a spectrum, and identifying the sorts of visualization that would be involved as they cross into other spatial forms.  My notes, part curriculum development, part brainstorm, part webbing structure, took the form of mind maps and at the time helped to organize my ideas. This set into place a way of thinking about art, design and making activities that I use in the Engineering and Design Lab and art studio today.

screen-shot-2014-12-27-at-5-58-39-pm

Student orthographic projection

The Mind’s Eye

Moving back and forth between 2D and 3D approaches encourages mental visualization and strengthens spatial skills. Providing opportunities to practice translating mental imagery into the physical world empowers makers.  An architecture student might undergo this process, accessing the idea in two dimensions by drawing a quick sketch of a structure and developing the visual idea to include floor plans, elevations, cross sections and linear perspective renderings.  Eventually the idea is brought into the physical world through the creation of a 3D model.  The student utilizes mental visualization moving from 2D to 3D representation first by drawing then with physical construction to execute a design idea. A reverse approach is used in a project designed for Middle School students titled, “Think like an architect, Draw like an engineer”.

A recent lab project used a 3D entry point as students prototyped iPhone amplifier designs out of foam, cardboard and recyclable materials.  The prototypes were tested for amplification.  Before moving onto a sketch, students had to translate their design idea into a second prototype using flat material stacked and configured.  The material had to be easy to cut build with.  Stale toast was our choice for this design challenge!  Moving from 3D to 2D, students drew up plans of their designs, considering how each layer would register to create a three dimensional object.  They redrew their flat designs in Illustrator and these design files were compiled and cut on the CNC router.  The final stage in this project brought the design back to the 3D world as students constructed their amplifiers.  The sequence as follows: 3D prototype→ 3D stacking prototype→ 3D drawing plan→ 2D design plan as a drawing→ 2D vector drawing→ 3D construction.

amp

Linking the Eye, Hand and Mind

It’s standard teaching practice in the art field to describe the act of drawing as an exercise in linking the eye to the hand.  Adding the mind to the mix gives makers access to mental imagery as well.  Drawing is a visual language that unlocks student power to bring their ideas into the physical world.  The beauty is, the ideas do not have to be practical, functional or realistic.  Like Leonardo and his inventions, many of which were precursors to modern designs, students can stretch their imaginations outside of the boundaries of the physical world and imagine what could be possible tomorrow.

To what end is all of this hard mental work of visualization and representing?  STEM folks might say “It’s essential to engineering.”  Art folks might say “It’s essential to self-expression.” Whether you are couching this question in the context engineering design or hatching an idea untethered to function, we may simply want to frame it as essential to making.

A “Resolution” for 2015

by Keith Ostfeld

I HATE using the term “New Year’s Resolution.” It carries so much baggage with it and it tends to be some BHAG (Big Hairy Audacious Goal – for those who read certain business books) that feels seemingly impossible come January 1 and so ends up being dropped within the first few weeks. That’s not to say I haven’t tackled some BHAGs. For example, at the start of 2013, this is what I looked like (technically, I shot this video in late 2012, but you get the idea):

old-me

Since January 2013, I have lost over 140 pounds:

fablearn

(I’ve also gained a few more gray hairs, but Papa Time is cruel). However, I didn’t start off with a resolution of “I want to lose 140 pounds.” Well, actually, I did for several years in a row which went nowhere fast because it seemed so insurmountable that I simply couldn’t do it and gave up quickly after starting. The difference between 2013 and prior years was that I was very realistic with myself. My wife signed us up for a weight loss pool with some friends on Facebook where, for 8 weeks, we’d track what we ate, exercise for at least 30 minutes a few times a week, eat more fruit and veggies, drink more water, and avoid sweets for most of the week. Doing each of these things successfully earned points as did loss of weight. Each participant tossed in $20 and the total pot was split between the person earning the most points and the person losing the greatest % of body weight. My goal was simple – earn the most points possible for those 8 weeks (which also happened ot be the most points in the group). But, what I discoved was that after 8 weeks, many of these tasks that I had to really focus on for the first several weeks had become habit. I was eating healthier, I wanted to exercise more often, and, best of all, I was losing weight. And now, I weight less than I did when I graduated from high school.

So what does this have to do with making? Good question – I seemed to have gone off on a bit of a tangent from where I had intended. Earlier today, I read an inspirational post from fellow FabLearn Fellow Juliet Wanyiri about how she and her students rolled up their sleeves and dove into solving a real-life problem in Uganda (don’t want to give it away – read the post!). But it made me think – how many times have I gotten excited about wanting to make something new, often using technology or tools of which I only have peripheral familiarity, but spent so long trying to figure it out in my head so that it would be perfect that I failed to ever get started. My desire to make something that measured up to my “perfection” standards left me in a state of perpetual non-starting. Why? I constantly create things for work that I would have to tinker and sometimes toss out and start all over, whether it was an idea for an exhibit, a funding proposal, an article, or a prototype for an activity. And I regularly dive into working with my daughters to help them make things for their school projects or when they are excited about a new hobby (I’m looking at you Rainbow Loom!). I’m wondering how many other people suffer from this same issue, where new ideas stay just as ideas because, frankly, it is easier?

I think it comes down to the fact that, for me at least, I have timelines and due dates at work. In other words, at work and with my kids, I have no choice but to dive in and go. I can’t spend a ton of time trying to figure out how to make it perfect (and, in doing so, procrastinate against the struggling part of the tasks). However, since I don’t really set deadlines for myself at home for my personal making hobbies, I can just let the ideas slide while other things in life naturally insert themselves, allowing me to avoid any struggles with the ideas.

But, it is now time to get to making. So, my “resolution” for this year is to pick one of my making projects, one that involves me having to learn something new, one that I’ve been “getting around to finishing,” and set a short timeline for it. To me, this isn’t some sort of BHAG like “I will finish my personal projects.” Rather, it is something I can easily do that will hopefully start a new set of habits that will allow me to make my personal making life as effective as my professional one. I think I’ll start with that shelf system for my desk to help me organize my desktop a bit more…

desktop_0

Wishing all of you a very Happy New Year and hope that you have time to make something for yourselves!

Leadership in Constructionist Learning. (from Constructionism 2014)

https://m.youtube.com/watch?v=KkJ_Ndk_p50

The video clip that we presented in Constructionism 2014 in Vienna. Our CEO of the education and learning development in Thailand, Mr. Paron Israsene, shared his learning point from being top leadership of the project since 1997. The project in Thailand in the early stage called the Lighthouse Project which evolved to be the Candlelight Project later onin 2013 with Stanford University. This project focused in implementing Constructionism Learning  into real life learning for Thai schools, in human resources development of many industries and rural communities development.

I like the ending part ‘ the school grows into it.’  It takes time, persistence, continuous support to transform an institution or even a person.

Maker Family Day in Bangkok Thailand

Darunsikkhalai School for Innovative Learning (DSIL) promoted continuous learning both home and school by using making as a tool to help parents learn about their child. Making makes learning as a living and makes living also as a learning.

Dsil provides workshops for parents throughou the year both in parenting and learning to help parents to understand their child’s learning experiences. We believe that Constructionist learning is not just in the learning for students in classrooms but it is for all adults that around them to be role models for people who love to learn and develop ourselves continuously. We are making learnin rich environment to the students not only the physical resources but also the community that appreciate learning and growing.


Video clip:  https://m.youtube.com/watch?v=0sYQ169WBl8

Nerdy Derby Racing for Thai Teachers in Bangkok EDUCA 2014

35 teacher participants enjoyed learning by doing experience with Nerdy Derby Racing in the biggest Education Expo in Bangkok, Thailand.
This expo is an annual expo on education that provided workshops and seminars for teachers from all schools throughout Thailand.

Darunsikkhalai School for Innovative Learning (DSIL) provided a 3 hours workshop in this event. The workshop aimed to give the teachers direct learning experience as a learner to teachers who are interested about learning by doing and Constructionism. Teacher participants got to make a fastest small car that would run on the special designed track. The workshop has provided the time for teachers to experience learning by doing, working in team, testing their cars and bringing the best performance car to the final racing competition.

At the end, teachers reflected about their learning experiences as a learner themselves and shared ideas of what are they going to do in their classroom. Thanks to the original idea from New York, Jaymes Dec and his friend, that spread the fun learning experiences all the way to Bangkok, Thailand.

Video clip  https://www.youtube.com/watch?v=9UuJhpJDYF0

Hacking the Life Sciences Classroom

I recently helped to coordinate a “hackathon” with the Rockefeller University Science Outreach Program in part to address these questions:

  • How can “making” or “STEAM” play out in the Life Sciences classroom?
  • What role can digital design and fabrication tools have in the Life Sciences Classroom?
  • How can physical computing tools and creative coding contribute to the Life Sciences classroom?

On a Saturday, we gathered about 30 educators, mostly life sciences teachers, but also technology and art teachers, from the NYC area. We had about 50% public teacher participation. We also invited 30 prominent biologists, biohackers, and engineers to spend the day tinkering, exploring, and prototyping project ideas with an abundance of materials and tools. Here is that list of supplies.

The morning started with a few short presentations in an auditorium. I spoke about Digital Design/Fabrication, and Physical/Creative Computing. My slides are here. Then we had Sebastian Kraves and Zeke Alvarez-Saavedra from miniPCR give a presentation about their project to make DNA amplification through the Polymerase Chain Reaction accessible to anyone. Finally, Sarah Weisberg from the BioBus, gave a presentation on their travelling Bio Lab and the MiScope, a portable digital microscope.

After the talks we had an “Ideas Fair”. In the weeks coming up to the event, we had gathered a few interesting DIY Bio ideas on this Pinterest page. These were printed on paper and hung around the room. During this portion of the day, several organizations and experts set up info booths around the room so that people could come and chat about hands-on life sciences activities. The miniPCR and BioBus people had spaces, as well as BioBuilder, The Makery, Genspace, and Harlem DNA Labs.

After about an hour of idea trading and pollination, everyone gathered for a group brainstorm session. Inspired by the format of the Constructing Modern Knowledge Summer Institute, we had people shout out ideas while runners wrote them on large post-it notes hung around the room.

There were many excellent ideas for projects. Here are a few: Hacking your own DIY Bio lab kit, a neuron model video game, natural selection simulation on Scratch, an attention measuring device, heart rate sensing, biofeedback device, 3D printing normal and mutated proteins, a Tamaguchi type game that simulates viruses, a birdhouse with sensors (tweeting birdhouse), and making music from proteins.

After a lunch break where we encouraged people to continue talking about the ideas, the rest of the day was dedicated to project time. Many people moved around the room from project to project until they sorted out which project they wanted to work on. As expected, some of the ideas got dropped, some new ideas formed, and some ideas organically combined. For the final hour, we moved from table to table as we did presentations and debriefs on each project. At the end we had a nice group conversation about some of the challenges around implementing these types of projects in the classroom.

The “highlight” projects were:

hackday2014-258_0

Photography by Bianca Bourgeois, WaveParticle Films.
A model of different types of neurons using arduinos, leds, and photocells.
 This team wanted to make a model that demonstrated how different types of neurons communicate across a system. They drew a network of large neurons on paper. Then they used LEDs to model the electrochemical signals getting passed across synapses. On the dendrites of each neuron, there were photocells that “received” the signals from the LEDs. Some neurons would fire only when they received signals from two other neurons. Some were inhibitor neurons that would prevent others from firing if they were activated. It was a fairly complex system. This group of about eight researchers and teachers had never worked with physical computing tools before! They split up into smaller groups and each group contributed by making a different neuron. It was really fun to watch them as they worked to calibrate threshold values and map analog input values to PWM values. They really seemed to enjoy the trial and error process.

daphniapooping3

Thanks to Sarah Weisberg and the BioBus for this classic GIF! 
Timelapse GIF of Daphnia pooping

Sarah Weisberg from the BioBus, brought a MiScope, a portable digital microscope. A team of educators and scientists spent the afternoon watching Daphnia water fleas under the microscope. They dyed some algae and fed it to the Daphnia. Then they watched and took video as the food travelled all the way through the digestive system. They created a great animated GIF of the Daphnia pooping.

Measuring attention with biosensors and Scratch. A group of teachers spent a few hours experimenting with different techniques to measure attention. They hacked a few off the shelf devices and used several different sensors to collect their data using Scratch. Stephen Lewis brought a few of his new MakeSense! boards. They allow you to easily get analog sensor data into Scratch. The group wrote a Scratch program that graphed data in real time. They collected data on heart rate and galvanic skin response.

eating-peppers

Photography by Bianca Bourgeois, WaveParticle Films
Physiological response to eating hot peppers. In that same group, one of the teachers was inspired by his students and their obsession with hot peppers and rankings on the Scoville Scale. He wanted to try to use sensors to measure the human bodies response to eating hot peppers. After a quick trip to the local market, another Fab Learn Fellow(!), Tracy Rudzitis volunteered to be the test subject. We could clearly see an increase in her heart rate as the capsaicin kicked in.

knitted-organs

Photography by Bianca Bourgeois, WaveParticle Films
Sewed and knitted organs. 
An arts educator from Brooklyn International High School coordinated a team to knit and sew a few human organs at actual scale. They made models of parts of the digestive system including the stomach, bladder, and intestine.

crickets

Photography by Bianca Bourgeois, WaveParticle Films
Prototype of Experimental device for studying circadian rhythms in crickets. 
This team wanted to make a box with sound sensors that could collect data on the chirping rhythms of crickets. The idea was to create an artificial environment that made it easy to change single variables (vibrations, light cycle, sounds, etc) in the cage and study the effects on the circadian cycles in the insects. This was an ambitious project for the time allowed, but they did demonstrate their idea with a diorama including 3D printed crickets!

Too often the life sciences is taught through memorization of vocabulary words and labeling diagrams. These direct teaching methods suck the wonder and life out of the Life Sciences themselves!

It’s clear that “making” or “STEAM” can play a significant part in breathing life back into the Life Sciences classroom. Creating real working models of biological systems and collecting and analysing actual biodata is true science, treats students like real citizen scientists, and exposes them to the joys and mysteries of the life sciences.

One classic method of teaching life sciences is to have students build models of biological systems. While this is certainly a better method than memorizing vocabulary or labelling diagrams, these models are too often static and don’t represent the dynamic nature of these systems. As we were planning this event, I often talked about going “beyond the model”. But it turns out that physical and creative computing tools allow learners to quickly prototype dynamic models of biological systems that are so much more instructive than static models. It’s one thing to explore the interaction of different types of neurons through a drawing. But when you have to make a working model of the way they communicate and inhibit communication with each other, you really do understand the system at a deeper and more appreciative level.

A common concern that we hear from teachers, especially in the life sciences, is that they don’t have enough time to “cover the content” and do hands-on activities as well. I think that this view misses the true point of teaching and learning. School should not be about cramming in as much information as possible so that you can “cover” your content. School should be able creating opportunities for students to uncover or discover content so that they can construct their own knowledge. This is precisely what making and hands-on activities do so well. I can imagine that sewing or knitting bodily organs would take a lot of time. But if some of the reasons for learning about the systems of the body include thinking about and appreciating the purposes and complexity of these incredible systems, perhaps slowing down and exploring the scale, textures, and connections between organs is not a bad idea. Teachers have to become more comfortable with sacrificing content for discovery and exploration.

Overall this event was a great success. We explored and addressed the posed questions about technology, making, and the life sciences. Additionally, the event served as further proof that this format of bringing together experts and educators to tinker and experiment with creative uses of technology works really well. In the near future, we hope to organize more events like this one. I think it would be interesting to target groups of teachers from disparate subjects like: History and Science, or Music and Math.

A little holiday historic making

I have some trouble thinking about the 1970s as far back in history, but the White House History twitter feed gave us this gem last week: clothespincardinal
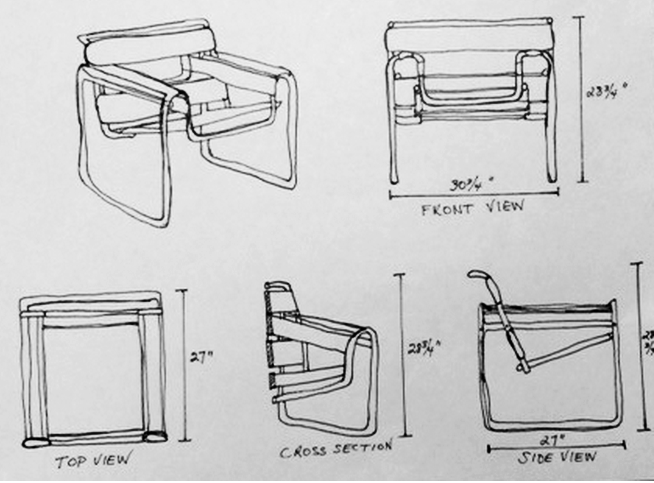
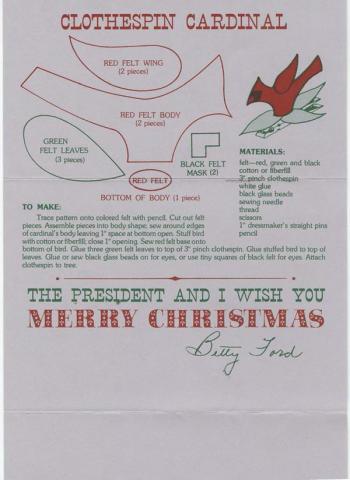
Betty Ford’s holiday card from 1975 included a pattern for a home made holiday orniment, the Clothespin Cardinal.

So, as a historian and a fan of making, I sewed one last week on our “rain day” (feel free to laugh, but we did have a lot of flooding, and some dangerous travel conditions, so call it an overabundance of caution).

It was easy to make, and while it does not blink like the amazing holiday sweaters posted last week, it is a fun quick project for the holidays.bettyfordcardinal

An Argument for STEAM as the Trojan Horse for ”Making”

steam-as-trojan-horse-notes
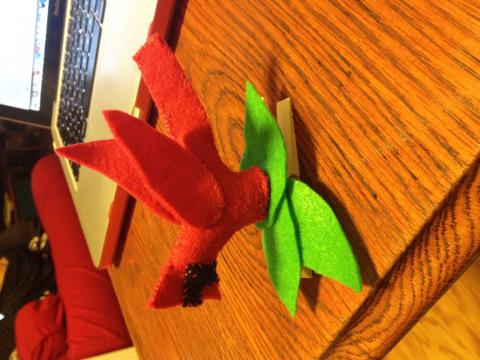
“…in the real story of the Trojan horse, it wasn’t the horse that was effective, it was the soldiers inside the horse. And the technology is only going to be effective in changing education if you put an army inside it which is determined to make that change once it gets through the barrier.”

                                                                                                                                                – Seymour Papert


An Argument for STEAM as the Trojan Horse for ”Making”

by Christa Flores and Patrick Benfield

Armed with the history of STE(A)M …Lets start talking

Why are MakerEd programs valuable in school? Some say ‘Making for Making sake’ should be a school’s philosophy. Still, many program developers and administration still spearhead maker programs using the term STEM or STEAM, due to its familiarity and association with marketable job skills. In an effort to collectively articulate key themes to justify making in schools, without excluding the influence of economic theories and hopes, Patrick Benfield of St. Gabriel’s School (Austin, Texas) and I, will share our thoughts going through this process. Our hope is that sharing will aid other maker program hopefuls needing an argument for bringing making to their schools. We hope that our programs will not default to the shoulders of the science or technology departments but will have equal footing in the arts, humanities, social emotional and service learning programs, as well.

Perhaps you have seen the value of making at your school, and now your program is on the cusp of expanding into the regular school day in a more extensive manner. Both the Hillbrook School and St. Gabriel’s are experiencing growth that is changing mindsets, questioning systems/structures/schedules and breaking down boundaries between disciplines, in large part due to our respective heads of schools’ passion for having strong maker programs. Growth can be hard for schools, and as Patrick and I will be discovering, the more we work together, the stronger our campaigns will be for having making for making sake, as well as for building marketable skills. In this series of blogs, Patrick and I will reveal our efforts to build a framework with, and for, our own schools, for the justification of a signature junior kindergarten through 8th grade maker-based program. We expect to dance a fine line between language about job skills implied within the safety of the terms STEM or STEAM, and arguments of democracy and inclusivity, when we focus on teaching to the whole child.


Next in this Series:

STEAM, de Trojan Horse for Making ”Inclusivity”

Make a Techno Ugly Christmas Sweater Project- Part 2

img_1128-001

Let me let you in on a little secret… that ugly sweater from the Part 1 guide was my sweater from last year.  Yup, that right. I’ve had a year to refine, learn and hack a new sweater.  And I have to say that I’m pretty proud of this little project. And, I want you to be able to make one as well!

Here is the executive summary of the project along with a video of my upgraded (read “awesome”) ugly sweater.  The core of this project is a cool sequencer called Vixen, an AdaFruit Flora (with a FastLED library), and a bunch of NeoPixel stips (or other digitally addressable RGB LEDs) Grab a gift bag, load your laptop, some speakers and tissue paper – you are set!

The Theme-

What says, “2014” more than the Frozen soundtrac I wanted to make my sweater the epic ugly Christmas sweater for 2014 and I when I found this rendition of Frozen I knew I had the makings of a winning sweater.  I used the free version of WavePad to edit the song to a shorter length.  I loaded the code on my Flora so that it could receive serial communications from Vixen, set up the NeoPixel elements for the different zones of my sweater and then imported the song into Vixen (see the full tutorial below).

You’ll have to let me know but I think I might have even beat the Griswolds this year.  I’m thinking that I should go stand on my street corner and broadcast my own house light display channel.  Dancing sign guy, prepare to be bested!

Check out the video–  (Better video Coming soon) Short alternate video

Follow the steps and have a great ugly sweater party of your own.  And hey, “Do you wanna build a snowman” on your sweater?  Well, that will just have to wait for another blog post..

Here’s the step-by-step:

  1. Collect your parts- Flora, Neopixels, wire, cotton balls, laser cut snowflakes, ugly sweater bling.
  2. Download and install software- Adafruit’s Arduino IDE, FAST LED library, and Vixen (see resources below)
  3. Upload sketch to Flora (remember USBTinyISP programmer, and remember you COM port too)
  4. Close out of your Arduino IDE
  5. Configure Vixen for Generic serial port using the same COM port as your Flora was using. (see blog link below)
  6. Setup Vixen Displays- I suggest breaking your full strand of NeoPixels into small sections/segments so that you can do different effects on each segment.  I used about 80 pixels on my sweater with 8 different segments (also called elements in Vixen).
  7. Connect your NeoPixels to Pin6, Ground and VBatt on the Flora (make sure you put a 330ohm resistor on the data pin of your first pixel so you don’t blow that pixel and kill your whole setup!).
  8. Close Vixen and the Flora.
  9. Turn on your devices in this order: Plug in the Flora connected to the Neopixels (you should see a green light and yellow RX LED on the Flora flash.
  10. Open Vixen (you should now see a solid yellow light on Flora if all is configured correctly if not, make sure that your display is set up to receive the same COM port as your Flora is using)
  11. Open a “New Sequence- Timed sequence” in Vixen.
  12. Drag an effect to the pixel segment you’d like to test and click the “play” arrow (green play button). I like to use the “chase” effect to test out the whole strip at once.
  13. Build your sweater: cut strip into segments, run wires, and resolder to chain your strip segments all the way around your sweater to different locations (I started at the bottom left, then up the zipper, around the collar, down the right zipper, to the bottom, up to the left middle, left pocket and finally around the back to the right pocket.) You can power pixels from anywhere the beginning, the middle or the end (or all of them) just make sure your data pin wire is 1 continuous strip)
  14. Test it again.  Once your strips are installed on your sweater check all connections and retest.
  15. Take a break.
  16. Spend way too long syncing music to your lights in Vixen audio track.  Click here for my synced version of the Frozen remix.
  17. Decorate and camouflage your LEDs with cotton balls, or laser cut felt, or other fun stuff.
  18. Tweak, troubleshoot, and repeat.
  19. Hook it all up to your computer, hide your computer in a gift bag, put on your sweater (or vest) and head out to your Ugly Sweater Christmas party.
  20. Enjoy, have fun and remember, “The best way to spread Christmas cheer, is signing loudly for all to hear”

Advanced Resources: